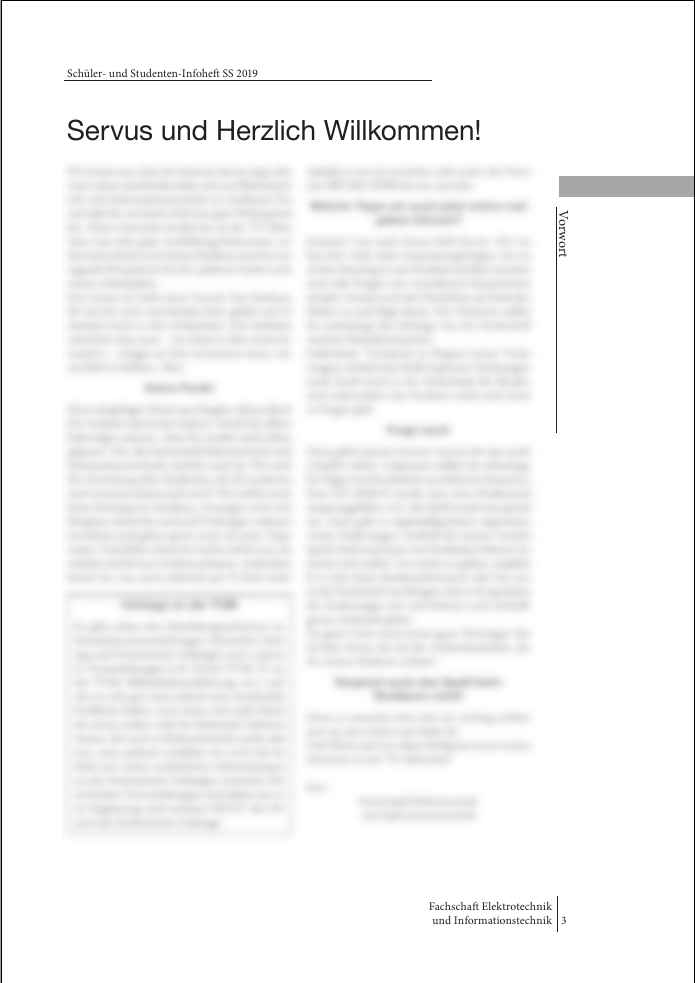
Recently, my student association decided to kill off the last Windows server we had, among other reasons because Microsoft changed their payment model and our university could not provide us with a cheap license anymore. One of the remaining projects which depended on Windows was our information brochure for pupils and freshly enrolled students. So far, it had been typeset in InDesign, as someone years ago had decided to do so, and maintaining it had always been easier than starting over. I have recently been doing many things with LaTeX anyway, so I decided to get the skeleton document set up so others could carry on and copy the contents.
(A link to the full code is available at the end.)
The first step in starting a new document should be to select an appropriate documentclass.
I have very good experiences with the KOMA script classes, so I chose scrartcl as our brochure is essentially a collection of articles.
You can pass some parameters to it: I only set double-sided layout (twopage) and some basic text-size.
% in main.tex
\documentclass[
  twoside,
  fontsize=11pt,
]{scrartcl}
I also know our document will be german, so setting full character support and the right babel package always helps. But since this is an online example, I will set the language to english.
\usepackage[utf8]{inputenc}
\usepackage[english]{babel} % could be ngerman as well
With this, the basic setup ends and we need to get our actual document started. Since I'm mostly building the skeleton so that others can fill in the content, I would advise adding some filler text to test your layout. Of course you can already use the final text if you have it.
% for filler text
\usepackage{blindtext}

\begin{document}
\blinddocument
\end{document}
Once we have saved this, we need to compile. There are many build tools out there, but I usually default to pdflatex in combination with a Makefile, since I find it very portable and can add other stuff to the Makefile as well (also vim-like editors support :make by default). The following is probably a bit linux specific, but if you have a LaTeX editor on Windows or Mac they will probably support setting up similar build options.
Note that for this to work, your system should have a version of LaTeX and make installed...
The command syntax for compilation is pdflatex filename.tex, so in our case pdflatex main.tex.
Wrapped in a Makefile in the same directory as your tex file it would look like this:
# Makefile
all:
    pdflatex main.tex  # compilation
    rm -rf *.aux *.log # cleanup
The 3rd line with the rm just cleans up everything in your directory which the default build process will leave lying around, like .log and .aux files.
Now you can just compile by running make in the directory of your main.tex and a main.pdf file should appear.
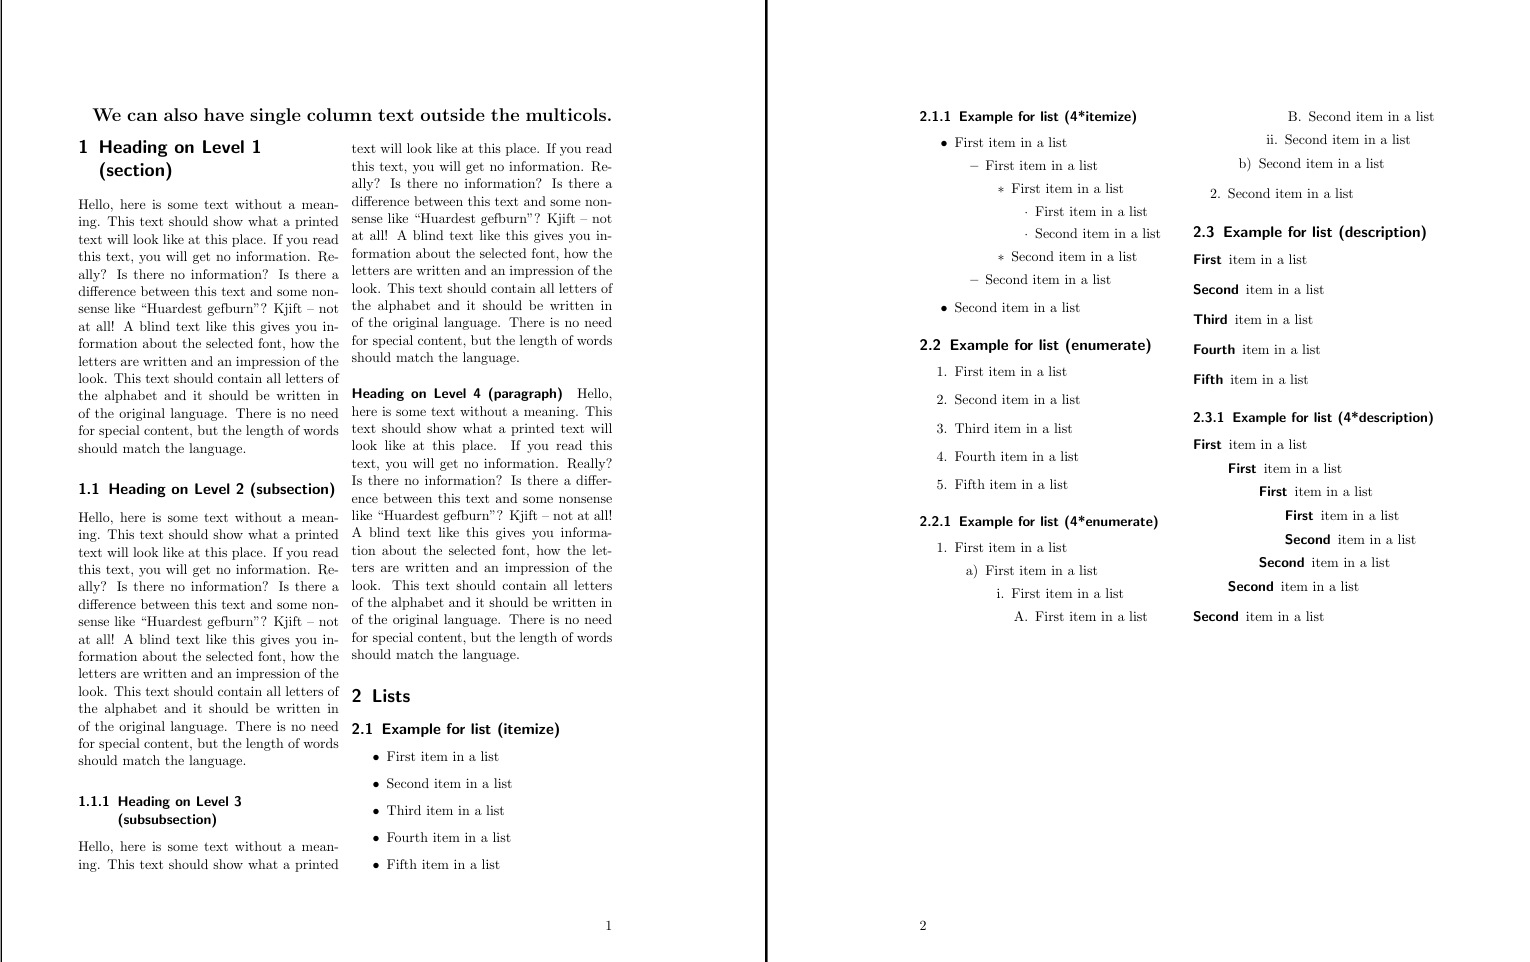
It will look like this:

I decided the first step should be to get the text roughly in the right shape.
Googling latex double column text lead me to the multicol package. Double columns can now be achieved using a simple environment:
\begin{multicols}{2}
  %text
\end{multicols}
\setlength{\columnsep}{25pt} can then globally handle the separation space between the columns.
For the headers I shortly looked at this great overleaf tutorial but then remembered I was using a KOMA class and might as well google latex koma header.
Good thing I did, because KOMA-Script provides its own solution, which is well documented in the extensive KOMAscript handbook on CTAN (currently around section 5.4). So I added this to my file:
\usepackage[automark,headsepline]{scrlayer-scrpage}
%[...]

% chapter number
\ohead{\leftmark}
% manually set title
\ihead{How to add margin headers}
What does this all mean? Check out the KOMA documentation for a really nice explanation, but the important parts are these:
For the header the commands \ihead, \chead and \ohead define the inner, center and outer header respectively. For the footer \ifoot, \cfoot and \ofoot do the trick.
So in the header we just set \leftmark, which stands for the chapternumber. I won't go into detail here, but marks fill another chapter in the documentation.
In this example I just set the inner header to a string. In a real document you could also use marks here to automatically insert chapter or section titles.

The footer is a bit more interesting as our old template used two lines of text here, which were aligned differently if used on a right hand side or left hand side, which is directly dependent on the page number, more specifically if it is even or odd.
KOMA script provides here as well providing for example \refoot for the right part of the footer of even pages and rofoot for odd ones.
With that in mind we can build our two-line footer using a tabular environment, which uses the l and r in the column argument to get left/right aligned columns, and a | symbol to fabricate the devision line.
I'm certain many other ways of doing this exist, but this worked nicely for me.
\hspace{} is used to align the entire thing nicely to the pagenumber provide by \pagemark:
% set our text content once
\newcommand{\yourfooter}{
    Falk Schönfeld\\
    A tinkerer's blog
}

% defines footer on even pages
\lefoot{
    \pagemark
    \hspace{1em}
    \begin{tabular}{|l}
        \yourfooter
    \end{tabular}
}

% defines footer on odd pages
\rofoot{
    \begin{tabular}{r|}
        \yourfooter
    \end{tabular}
    \hspace{1em}
    \pagemark
}

With all these in place we are already 90% to where we would like to be. Sure, we can play around with the sizes a bit, add header formatting, but overall the page looks like it should. But what we are still missing, and the only thing I have not found a direct command for, are the margin headers. I call them margin headers because they are in the margin of the page, however I'm not sure what they should really be called. There is no command to simply define them as far I am aware of. Of course, we could just skip them and decide it is time for a graphical overhaul. But it presented a nice challenge, so I tried to recreate them.
First off, let's decide on what we actually want to create:
Defining a command in LaTeX is rather simple.
I decided to just call it \sideheader for starters:
\newcommand{\sideheader}[1]{%
    #1%
}
The [1] part indicates the command takes in a single argument, which will be the text going in the header. The #1 means insert the text here. So far, we have nothing to with it, so it is rather pointless but a good starting point. (By the way, the % signs indicate a comment starting at the end of each line to prevent spaces from being added by Latex.
We can test it by adding \sideheader{Side title} anywhere in the document. But it will just be rendered just as any other text.
LaTeX provides the \marginpar{} to write text into the margin:
\newcommand{\sideheader}[1]{%
    \marginpar{#1}
}
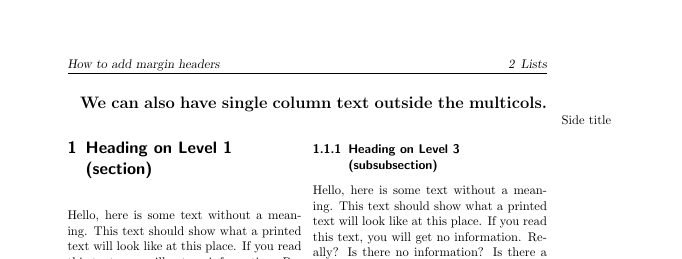
As we can see, our side header is now in the margin, so we fullfilled requirement 1. But it looks nothing like we want it to look. We should rotate it.
Rotation in LaTeX can be handled with \rotatebox{ provided by the graphics package.
So we add the package include to our preamble:
\usepackage{graphics}
and add the rotation to our command.
\newcommand{\sideheader}[1]{%
    \marginpar{%
        \rotatebox{270}{#1}%
    }%
}
The result looks ok, but not great yet.
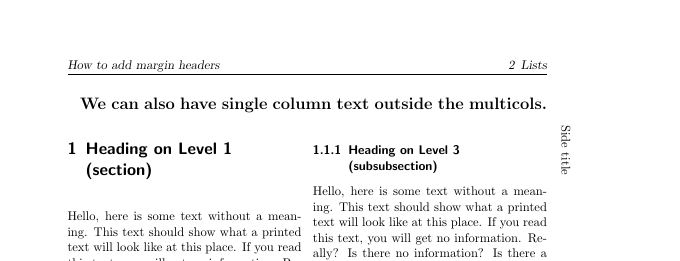
Getting larger script is easily handled with e.g. the \Large command.
And to get the underline, I actually abused the tabular environment to use an \hline, resulting in the following command:
\newcommand{\sideheader}[1]{%
    \marginpar{%
        \rotatebox{270}{
        \begin{tabular}{l}%
            \Large\textbf{#1}\\
            \hline
        \end{tabular}
        }%
    }%
}
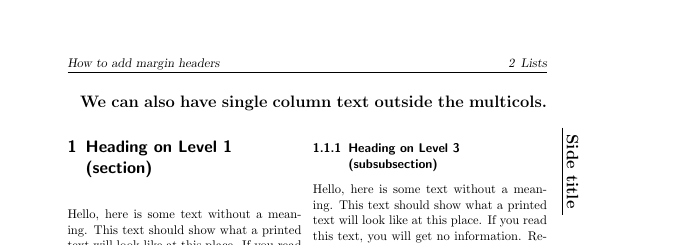
This looks ok, but the underline is only as long as our title.
There are several ways to migitate this, but I chose to add another line to the tabular environment and set it to the width I wanted my line to have. To set that width I added a 2nd parameter to the function.
I also chose to make it an optional parameter (the second angular brackets) to set a default line length. Since native LaTeX mainly allows setting default values for the first parameter, we now change the text input to be #2. Our invocation can remain the same as above, but if we wanted to experiment with the line length, we can add it in square brackets: \sideheader[15cm]{side header text}
\newcommand{\sideheader}[2][10cm]{%
    \marginpar{%
        \rotatebox{270}{%
        \begin{tabular}{l}%
            \hspace*{#1}\\
            \Large\textbf{#2}\\
            \hline
        \end{tabular}
        }
    }
}
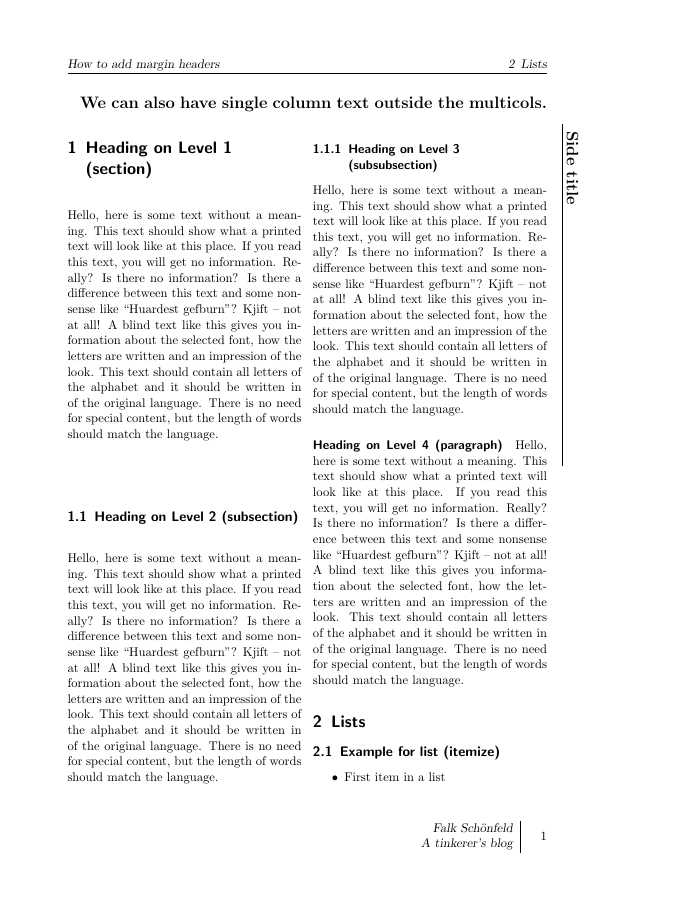
So we now have a nice header. At least if we place it on an even page. If we place it on an odd one, the rotation is wrong, and it is shifted to the outside.
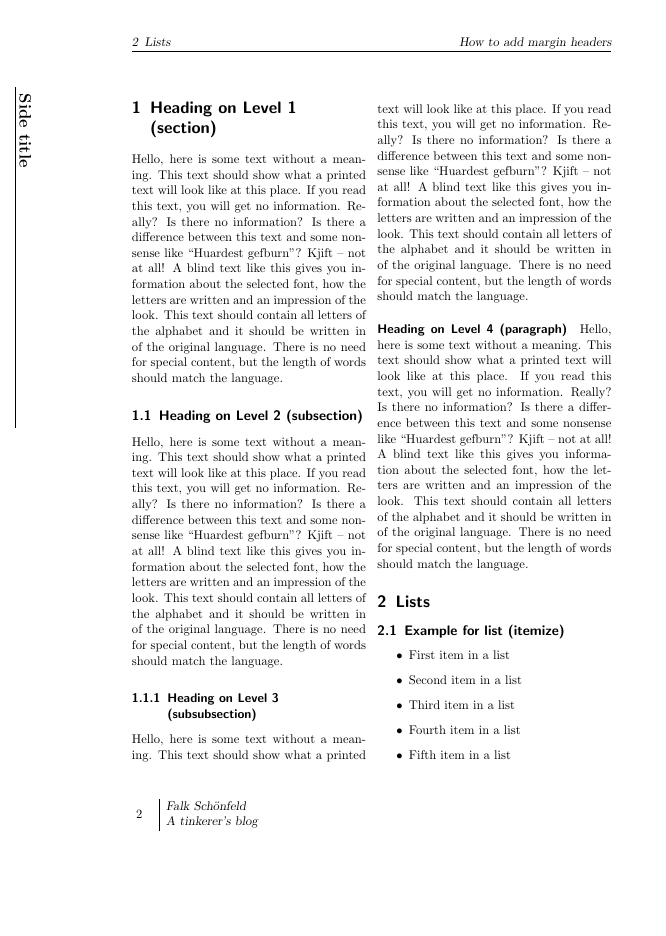
How can we fix that?
First off, let us rename our current command into \rightsideheader. That way we know what it does and can define a \leftsideheader to match it. We start of by copying what we have.
Since we are now on the other side, we need to change the rotation by 180 degrees, so we add pass 90 as the parameter to rotatebox.
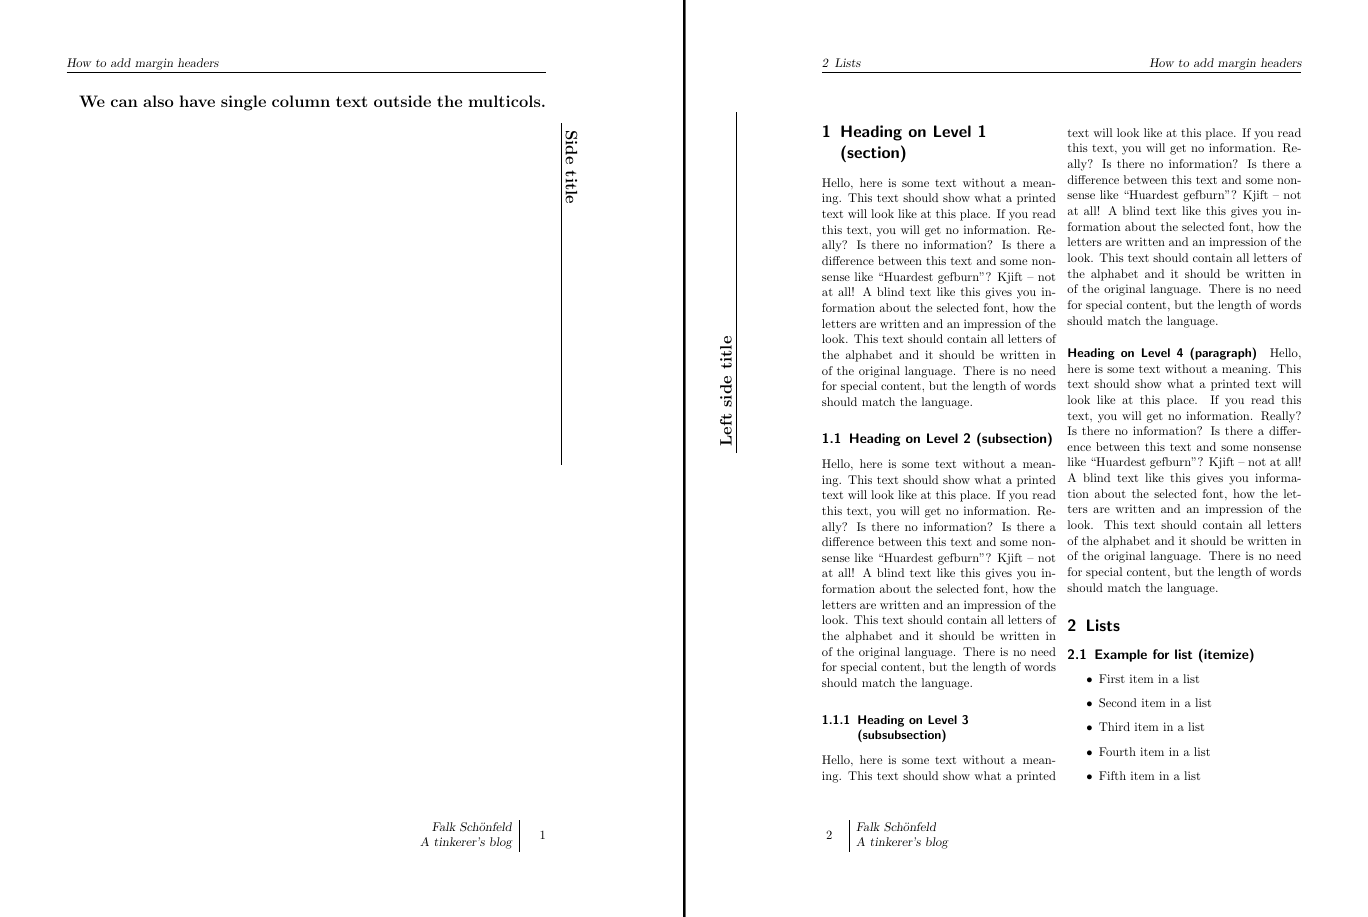
We can immediately see that our left side header is much further outside than the rightsideheader. That is due to the fact that most texts are left aligned, even in the margin.
We can push it to the right by simply adding an \hfill.
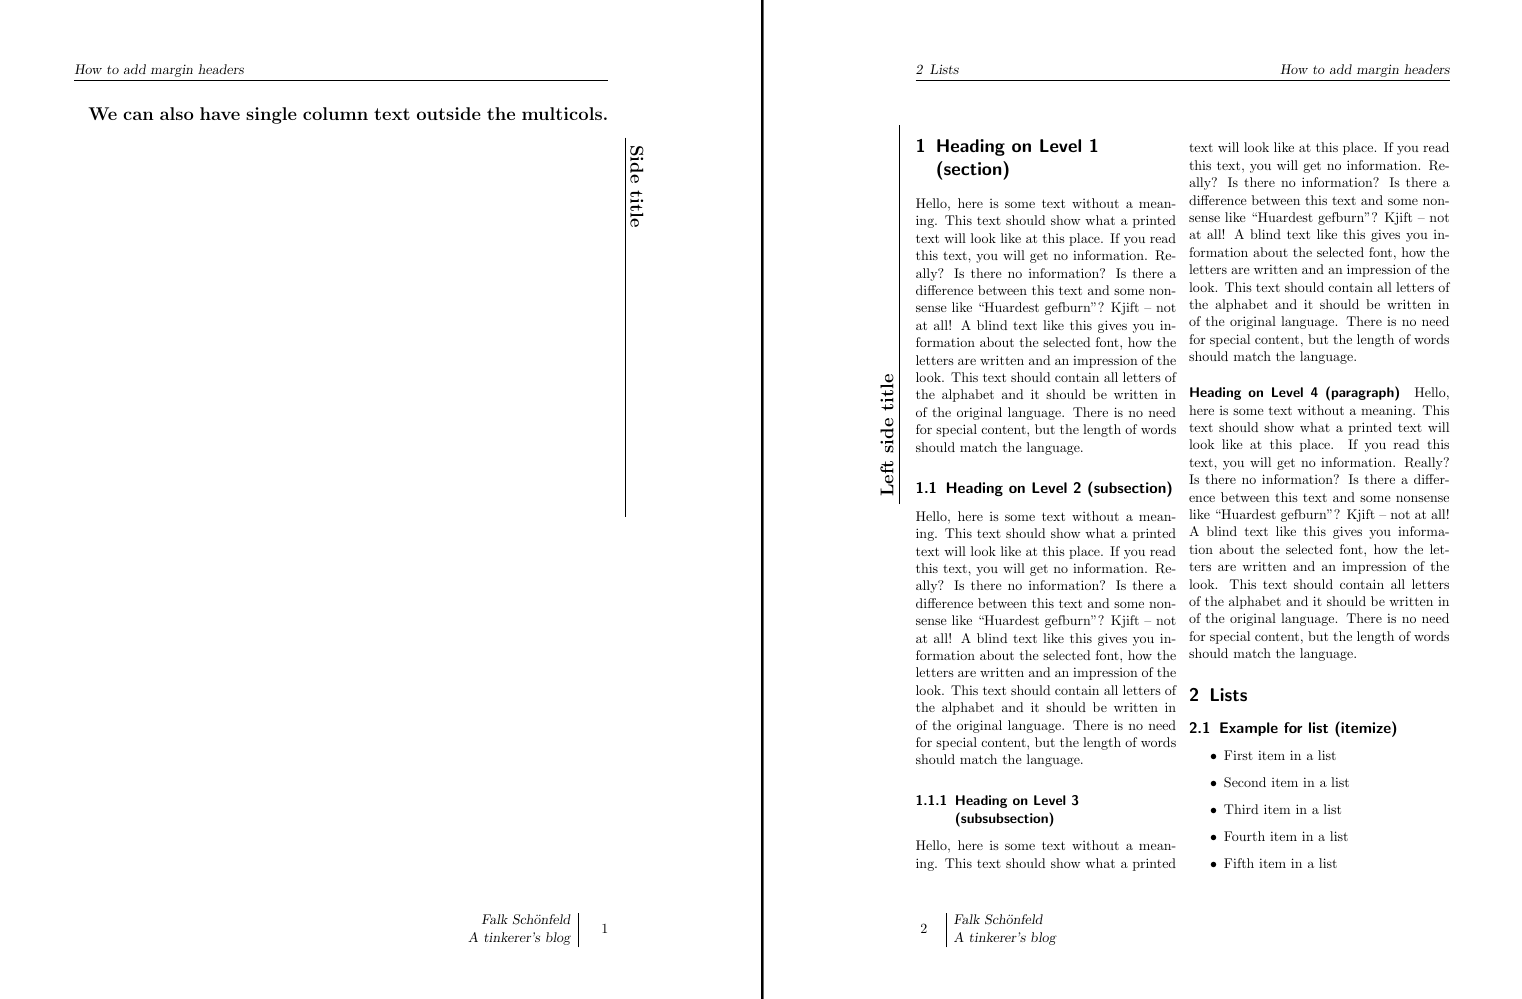
The text however is still left aligned.
We can right align it by passing r to the column entry of the tabular environment.

At least now both sides look about right, meaning we fulfilled goals 2 and 4 as well.
How can we ensure that we don't need to worry which side it will end up on.
Let's write a \sideheader function which takes care of that.
The \Ifthispageodd{ takes care of that for us. In each case, we just call our dedicated command.
\newcommand{\sideheader}[2][10cm]{
    \Ifthispageodd{
        \rightsideheader[#1]{#2}
    }{
        \leftsideheader[#1]{#2}
    }
}
And with that we have a fairly stable side header going.
You can get the full code example on gitlab and github.
Our new command for the side header fulfills all our previous criteria. Granted, it is not perfect and still has a few caveats. For example, if you add it to the middle of a page it will not start at the top. But if you are writing an article-based magazine, it works pretty well, as you can just add it at the title of your article.
In the end we decided to drop the side header entirely, so for my purposes it was just a fun learning experience. However, since I found no info out there on how to do this, I hope this can get you started. I have also since found a nice ornamental page layout done in pgfornament on reddit. Maybe I'll try that in the future. If you try it before me or know of a better way to do this, please let me know.
Overall the new LaTeX template was a huge success, we migrated the entire old content within a week. It enabled us to do some other interesting stuff as well, like fast QR-Code embedding for ease of use for the printed versions, proper cross-referencing for PDFs (which we never published before, but do now due to the pandemic). I built most of the layout in an evening, so the effort is acceptable, especially since repeatedly typesetting the entire document got much simpler compared to InDesign.