I've been riding bikes everywhere I can most of my life. To school, to university, to work, to festivals. Recently I noticed my old trail bike had a crack below the seatbelt clamp. Combined with some other wear and tear it got over several thousand kilometers of abuse it got me started on thinking about a possible replacement.
For a new bike I did want to try and get a road bike, because while I did the look and feel of heavy suspension, asphalt is what I ride on 90% of the time. I already owned and rode road bikes twice before, when I stayed in Sydney and Seattle for a while. Both times I got them cheap on gumtree or ebay, restored a few parts, rode them while I was there, and sold them at a higher price.
I thought a while about getting a new road bike, but the price tag of the ones I really liked were way higher than what I was willing to pay. Also, if I look at new stuff, I always tend to gravitate towards wanting to buy much more fancy shit than I need, which honestly doesn't help. So after a while I just stopped looking.
However, when I was looking for something entirely different on ebay, an ad for an old road bike just around the corner caught my attention, and after a quick search around I got in touch with the vendor. While I do always fear that I am offered a stolen bike, but in this case the bike looked like it spent the last decades in a garage. While that does not ensure it is not stolen in any way, at least it doesn't mean it wasn't taken from anyone using it. After I ensured that it ran reasonably well and haggled a bit, then pushed it home.

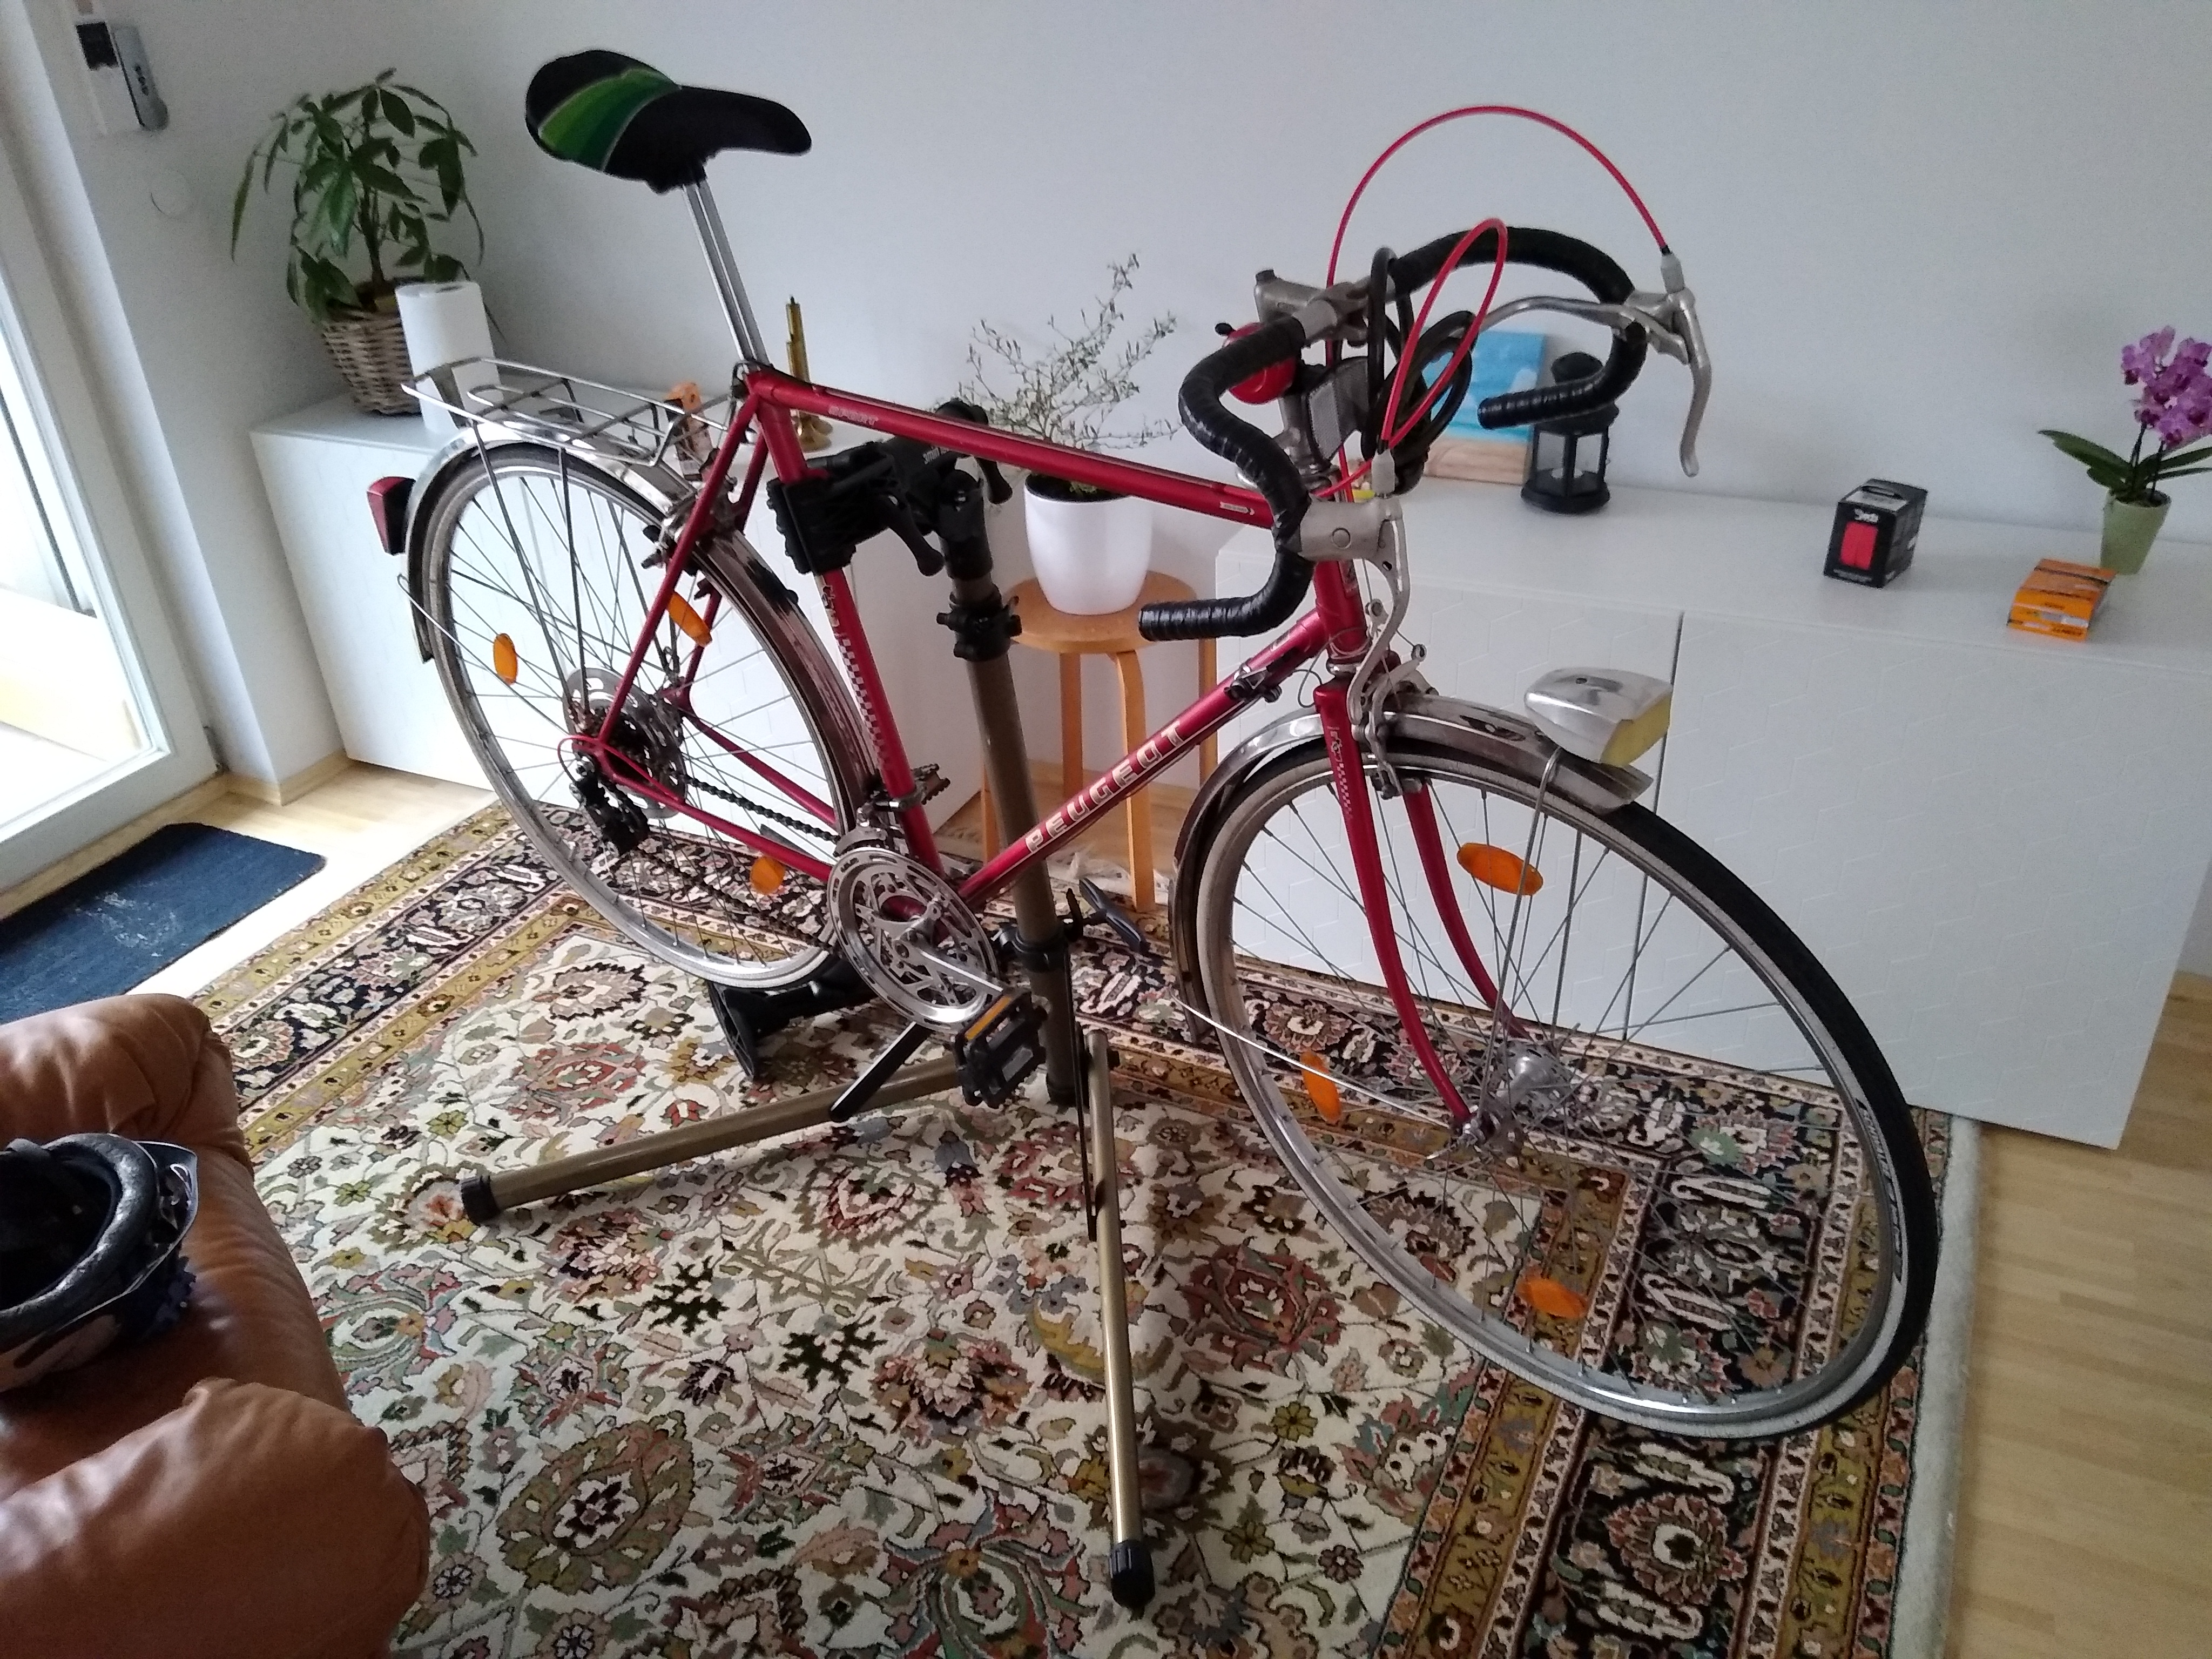
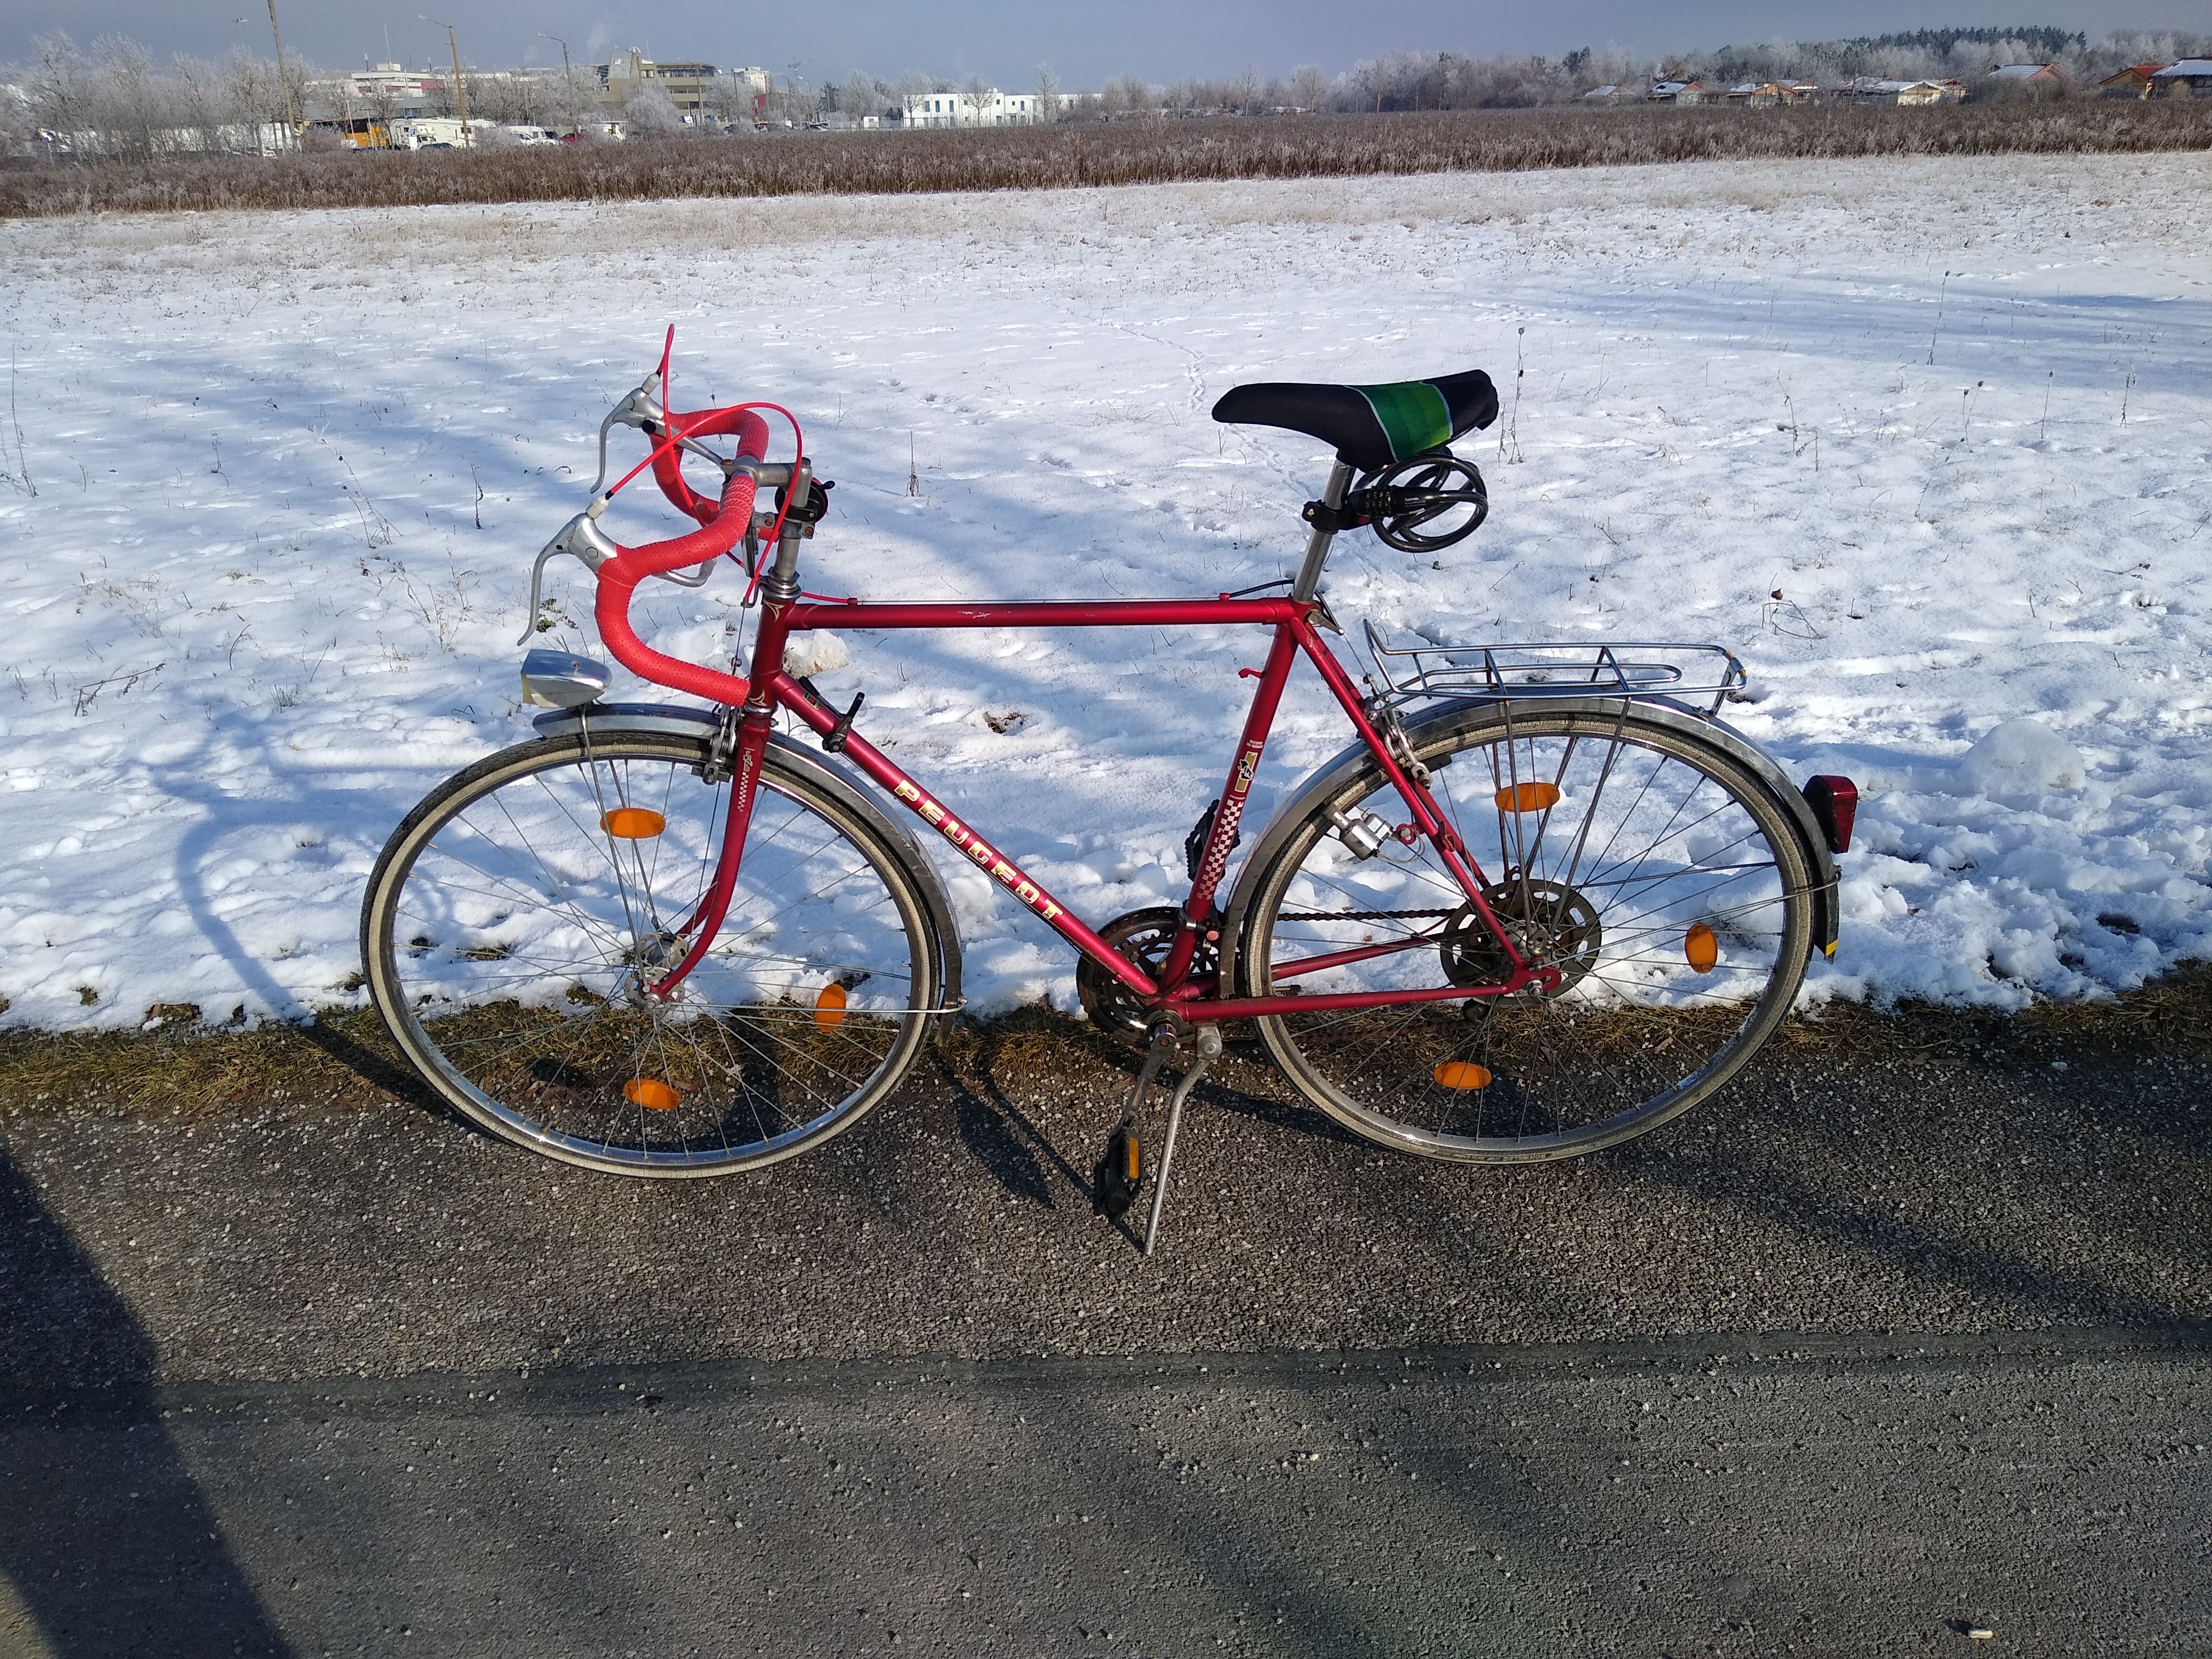
So, what did I get to work with? As far as I can tell it is a Peugeot PH8/D, as can be found in this old catalogue page from 1981. The equipment was mostly the same, minus the hand pump, handlebar tape and the saddle, which had been switched out for a different one. When I tested the bike before buying it, I noticed that the wheels turned nicely, which is always a good sign, and the frame did not have any obvious dents or signs of use. Apart from the occasional spot of rust there was nothing off putting. The derailleurs worked nicely, although they were not well adjusted. The tubes for the pulleys and the pulleys themselves showed their age. Instead of handlebar tape, the handle had been wrapped in electrical tape. The tires still seemed be original, a small crack from going brittle with age on the sidewalls but otherwise great. The valves were a dutch one and a french one, which had broken off. But they did not have any bends or much wobble in them, which was nice. I try to get quick release mechanisms on my bikes because I often manage to flatten tires (the downside of living in Munich, where public drinking is allowed and you often find broken beer bottles lying around), but don't want to carry wrenches everywhere. To my surprise, the bike had something similar: Wing nuts. I honestly had never seen them on a bike before, but decided that this was part of the experience. The center pull brakes looked ok, but needed adjustment and new pulleys. The dynamo seemed fine but the lights did not turn on.
Whatever you try to fix on your bike, youtube is a great resource. Since I had never replaced pulleys, only readjusted them, I watched videos on that, and on on center pull brakes. The two channels I kept returning to were Park Tools, which of course show off their own fancy products, but offer really clear instructions on fixing anything, and RJ the Bike Guy. I would probably start with park tools, since their video lists are really structured: You can watch an overview video on figuring out what the component you are trying to fix is called, and which subtype you have (e.g. center pull brakes, side pull brake, dual pivot brake, etc.), and then take the link to that specific video. Once you have watched that and still have further questions, you know exactly what keywords to google to get the answers.
Prepared like that I browsed a couple of websites to find the parts I was looking for. My go to website in Germany is bike-components.de.
While thinking things through, I also realized I could not just turn the new bike upside down and place it on saddle and handlebar, because the brake pulleys go straight upwards and it would bend them. So I searched around and decided to get a foldable bike repair stand. I did lots of bike repair without one over the years, and friends let me try theirs once before. While you can do almost everything without, it is much nicer to do with a stand. This one works really well, it is super stable and has nice pads on the feet which prevent scratching the floor it stands on, so I just overhauled my bike in my living room during rainy days. It made all the pulleys and brakes well accessible and I could turn the wheels to test everything without having to lift the bike every time. It also doesn't take too much space in my cellar while not in use.
I bought replacement sets for the pulleys for both brakes and shifters with red tube. For some reason that was the hardest decision, because the metallic red of the bike was already so flashy and I wasn't sure if I wanted to make it even flashier (before it had black tubes). I know from experience that flashy bikes tend to change owner fast, often against the will of the current owner. But then I decided that the bike already looked fancy anyway, so I decided to get the red tube anyway, and it really looks great on the bike.
I also bought a bowden tensioner tool. I have tensioned brakes before without one and always found it a huge pain to get right. As the Park Tool video showed off how easy it was with their tool, I decided to try it (with a cheaper knockoff). I really liked using it and would recommend getting one if you have to replace bike pulleys. In my opinion brakes are the most important part of a bike to maintain. And perfectly adjusted brakes can save you way more than 15 bucks when you ride in a city with dangerous drivers every day. Do try to get one with a ratchet mechanism though. Overall changing the pulleys was super easy following the video tutorials, and cheap to do. Each replacement set set me back 15 bucks, and the tensioner 15 more.
While adjusting the brakes I also completely took apart the brakes, cleaned off the rust using a dremel and a sanding tool, polished them with some oil to delay further rust and reassembled them. I took care not to oil the brake pads of course. Somebody had obviously tried to do that before, and had gotten the order of washers, adjustment rings and nuts wrong. Once again, the brake is the most important part of the bike. It stops you from rolling into moving traffic, running into car doors opening in front of you or running over pedestrians which cross your lane without looking. Especially if you buy a used bike, please check yours to make sure the guy before you knew what they were doing.
The bike also had an old Abus frame lock. It was locked in the open position. I did not get the key - in fact I didn't even notice it while buying the bike. While cumbersome, it was possible to unscrew the attaching bolt when the rear wheel was detached, so I did just that.
I also opened both front and rear light and took a look at the bulbs. I did not have high hopes, but both looked fine and after polishing the contacts a bit, both came back alive without any further work. I still have 3 proper spare light bulbs from other bikes, after that I will probably replace them with LEDs to get a bit more power. But for now having working lights ensures I always comply to road regulations and I can easily add a battery powered front light for dark nights.
While I expected this to be the easiest, I ran in a lot of trouble here. First, I ordered the wrong diameter tubes, too small, due to the fact that the lettering on the tire was so worn that I did not notice it. Then I lost my French valve adapter and hat to buy a new one, which I proceeded to lose 2 days later. At least I had pumped my new tires up first.
Still with the wrong diameter tubes I did the first test ride. My bike was still missing handlebar tape, but it rolled nicely. Until it didn't, some 2km down the road. The rear axle, held by two wing nuts, had slipped. Old bikes have a horizontal mounting slit for the axle, and if the wing nut is lose, the rear wheel will slip and grind against the frame. I readjusted the wheel, and tried tightening the nuts further by hand. But another 2km later the spectacle repeated itself. I did this a couple of times, and once the axle slipped in the middle of a crossroad and I had to quickly hop off and carry the bike off the road while cars were moving around me. Can't recommend. After about 10km the (wrongly sized) inner tube of my rear wheel gave up and I left the bike close to a subway which I took to work.
After I carried my bike back home I began raiding local bike shops for the rest of the parts. I took the wing nuts to a bike shop and got proper nuts which I could tighten further. I also got inner liners for the tires since those had rotted away over the years. The shop guy also helped me spot the proper inner tube diameter on my tire, and I decided to go for car valves to skip the adapter. The valve stem was too wide for my wheel, but a drill solved that problem once and for all (yeah, I know, that is a brutal solution to this problem, but this project was about making this bike safe and fun to ride first, and only to keep the original look second).
I also got handlebar tape. Previously I had looked at West Biking road bike gradient handlebar tape but I wanted my bike finished now, so I just took some nice red handlebar tape available at the store. Maybe when I need to replace it in the future. Once again I argued internally between flashy red and somber, dirt-resistant black, and once more flashyness won. After all, this bike wasn't going to look bad just because one part was black.
Back at home I tore off the electrical tape of the handlebar, which revealed quite the large rust spot underneath. The tape looked years old, so it was probably not the vendor who put it there but rather the original owner. Another thing which will go on the check lists for future purchases. Luckily the rust was only on the surface, so I cleaned it up somewhat and oiled the spot against further rust. Then I adjusted the brake handle positions and wrapped the entire thing. Park tools also has a great video on that.
Lastly I adjusted the saddle upwards a bit.
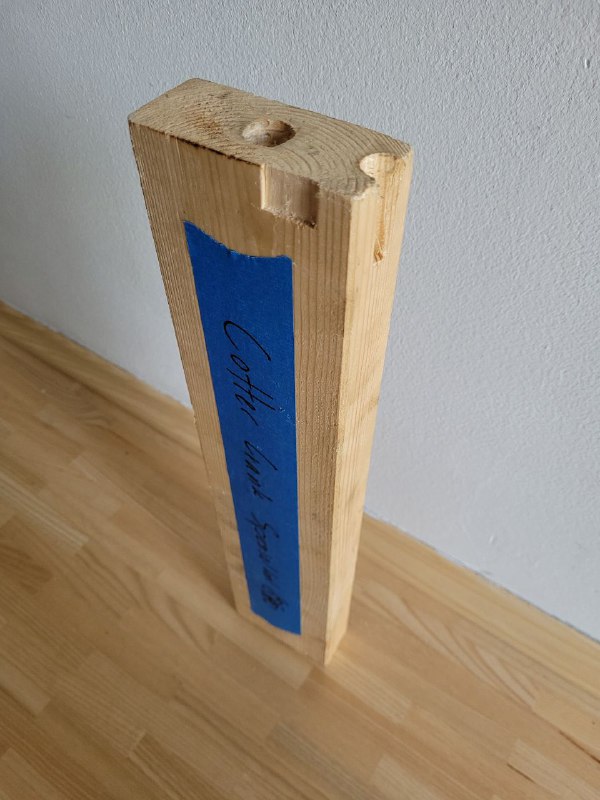
After I put in some kilometers, I noticed that the bottom bracket started clicking after riding for a while. I took a good hard look at the crankset and discovered they are cottered cranks. This is one of the areas were I am really happy that the industry has moved on. Once again, RJ has a great video for maintenance, and cotter pins are easy to buy as soon as you know what to google for. I disassembled the entire bottom bracket, cleaned everything, replaced grease and ball bearings and put it back together. Then it was only a matter of getting the damn cotter pins to hold fast, which only took me countless hours of frustration and several testrides where they started slipping halfway to my destination a bit of tinkering. Similar to RJ, the best solution I found was to get a piece of 2x4 wood as support while hammering the pin in. I additionally drilled a hole large enough to put it directly under pin so it is supported on all sides.


I've since ridden the bike around 400km before I changed work and my commute necessitated a trail bike again. It is well roadworthy, and I often use it on short rides or when I blow a tire on the other bike. But riding a bike this old always means maintaining it. Just the other day another biker told me "Your chain could use a drop of oil" and when I laughed and told him it isn't the only part of the bike which could use some, he added "But you are going pretty dang fast for that old thing." So yeah, the work is never done.
Also, the stretchy fabric on the saddle seems kind of worn, so I will probably pick up a cheap replacement at some point. Then again, my other bike has cracks in the leather of its saddle since years, so maybe not that fast.
In a city like Munich with flat streets and nice bike lanes this bike rules. While it is not a true racing bike and has some excess weight like mud guards, lights and rear pannier, it is perfect for my commute when I need to get to public transport. It is much lighter than my other bike and handles a lot differently, and is very fun to ride.
I also bought it during Corona at a time where the rest of the bike market got very sparse, apparently due to high demand and low supply. I didn't notice that, and scored a relatively cheap bike. Overall, I paid around 250€ on the bike, and another 100€ on tools which I have since used on other bikes as well. Of course I put a couple of hours of work into it instead, but I had fun doing it.
I'm also proud that I kept a bike of the landfill and gave this antique new life. Also, if I had bought a new bike instead, I would have gone down the rabbit hole of which gear I want vs which gear I need, which would have taken a lot more time than I spent repairing this one and probably bitten a larger hole into my wallet as well. This bike has lived for almost 4 decades, and I'm sure it will live another one or two at least. Sure it will need some spare parts, but since the mechanics are simple, it will be easy to find them.
For me it is a "luxury" bike and will only get used when I know my route will not go off the road. Luckily, my daily commute often fits the bill.
I also feel like I wouldn't want to leave it locked in the city for too long since it looks too nice. While I haven't had a bike stolen here, friends and family have. However, if it comes to that, losing 250€ is a loss I can survive.
If I were to get another road bike, I would look for the following things:
Overall, if you are looking for a new bike, consider taking a look at older ones as well.