After my former dives into keyboards - including the Ergodox EZ, the gboards Buzzkill, and a CRKBD, I decided I wanted something more personal.
After procrastinating hard for a while collecting my thoughts and experiences, I happened to see one of Ben Valleck's videos about designing personal keyboards.
(He has since made another more detailed one.)
This made me discover MrZealot's (Bán Dénes) ergogen keyboard generator, which
aims to provide a common configuration format to describe ergonomic 2D layouts and generate automatic plates, cases, as well as un-routed PCBs for them. [from the ergogen repo]
This got the gears in my head turning again. It took me a while - until my girlfriend caught Covid19 and I had to abandon all my weekend plans to be specific - to collect my thoughts and turn them into an actual design.
Everybody wants something different when it comes to custom hardware - which is kind of the point. I wanted the following things:

It took me a while of playing around with ergogen to get used to all the commands and possibilities. But after aforementioned interruption happened, I decided to commit and churned out a halfway usable design to refine in Kicad over the weekend.


I used printouts and .stl files generated by ergogen to verify that my designed layout actually felt good. I even fitted keys into a top plate to see how phantom typing felt. This process is something which I would recommend to anybody trying to go for a new layout.

With the layout sorted, I was ready for the actual electrical design - or so I thought. I made a couple of mistakes I would like to highlight to ensure others don't repeat them needlessly:
Unfortunate footprint alignment per key
My initial version of a "per switch footprint group" had the diode placed in a way that it nearly blocked all possible connection methods.
This slows down routing enormously.
Unfortunate matrix connections
With keyboards, you often use a keyboard matrix.
This means each row and column is connected to a pin on the microcontroller.
I managed to intuitively choose the most annoying way to assign them:
At first, my number row was connected to the lowest of the chosen pins on the microcontroller, my bottom row to the highest.
Similarly all other rows and columns fell in line to ensure every single connection basically had to cross all others as often as possible.
This became a problem since I did not realize it right away. Default Ergogen is only meant to place the switches and components and leave routing to Kicad.
Since I first routed all nets within the keyboard matrix in itself and only then tried to connect rows and columns to the microcontroller, I realized this way too late. When I did, I tried to change controller pin nets to a more useful order in Kicad rather than recompiling the ergogen, since I did not want to redo the matrix routing.
So when I got my first round of PCBs and wanted to solder the first parts, I took a close look and saw that none of the pads had any connections. And since the PCBs were flippable, I could see traces leading into nowhere, or more precisely, to where the pads were on the back side.

Well, 30€ well spend on learning one way how not to do it.
After that drawback, I got the next motivation kick during Virus Wars Episode 2: Corona strikes back.
This time I caught it, isolated in home office and had time again.
I fixed all the issues I encountered in the first round, improved my footprints and replaced TRRS with USB-C connectors between the halves.
I also got carried away and started routing in ergogen too.
Footprints with traces in ergogen With different tilting angles between the columns this really helped getting orderly, similar traces in all key footprints. A reversible footprint a footprint group for a key with a diode slot has some 8 to 10 traces at least. With my 6x4+4 keys, that is 224 to 280 manual traces which you save, which is worth the effort in my book.
All the traces in ergogen But at that point I had a murder headache from the virus and couldn't sleep anyway - so naturally I distracted myself by routing ALL the traces in ergogen. Not sure I would really recommend that. My recollection of the experience is hazy, but I think I would rather go for an auto-generated routing for the second half like this project the next time round. Still, it looks cool and does the job, so it is a win in my book.
After waiting another week I got the PCBs.
By the time I got this far I had gotten Nice!Nanos V2, which work with ZMK, a bluetooth focused, complete rewrite of the QMK framework. ProMicros cost less than 25% of them, so I wanted the USB-C as a backup for cheaper builds, but I haven't gotten around to actually using it.

.jpg "Adding clickyness")
.jpg "Building a keyboard is the second-best part of the process,")

I did solder on a set of USB-C ports onto one set of boards, but I never used them for the connection between the halves, bluetooth just worked flawlessly. I just wanted to route I2C across the USB-C data pins (which I know is an abuse, but I have a lot of USB-C cables so why not), but I haven't gotten much further than checking connectivity and shorts.
My current layout uses home row mods. Sometimes some held keys would not register as held but trigger several times instead, as if the switch was not properly debounced. That was easily fixed by replacing the switch, so it is most certainly a mechanical issue.
Another time (actually the second time I used them at work), I spilled hot chocolate over the board. Removing the switches made cleanup so much better.
I first used some standoffs from leftover projects with rubber nubs at the end for tenting. That lasted me a couple of months at work, since the keeb was basically instantly ready to use as a daily driver.
I have since revisited the openscad part of ergogen and am currently in the process of building a nicer stand. That will probably be another post though.
I ordered the batteries and plugs on aliexpress and they arrived after two months of almost daily keyboard use on USB. Losing the tethers was really refreshing and the charge lasts me 1-2 weeks.


Keycaps are a rabbit hole in their own right and part of my reason for choosing Kailh low profile switches is that the rabbit hole does not go as deep here yet as it goes for Cherry style stems. Nonetheless, when the MKB Legend set was released, I got two sets and they really helped tie the build together visually and I don't regret a cent spent on them. (BTW, I ordered most of the more specific parts on splitkb.com, and the rest on ebay and aliexpress.)
It feels great to design and build something and use it daily. The ergonomics are good. In my opinion the split is the biggest advantage, followed by the thumb cluster and then orthogonal layout. Of course, the fact that the column stagger and tilt is customized to my hands makes them great for me, but horrible for most others. Since the pinky columns is shifted almost one key unit against the ring finger column, I need to ensure that the halves are rotated enough against each other so that I instinctively reach for the right keys. But that is the most comfortable position anyway. Home row mods are nice, but mainly a gimmick for me, since I try to avoid making writing the primary part of my job.
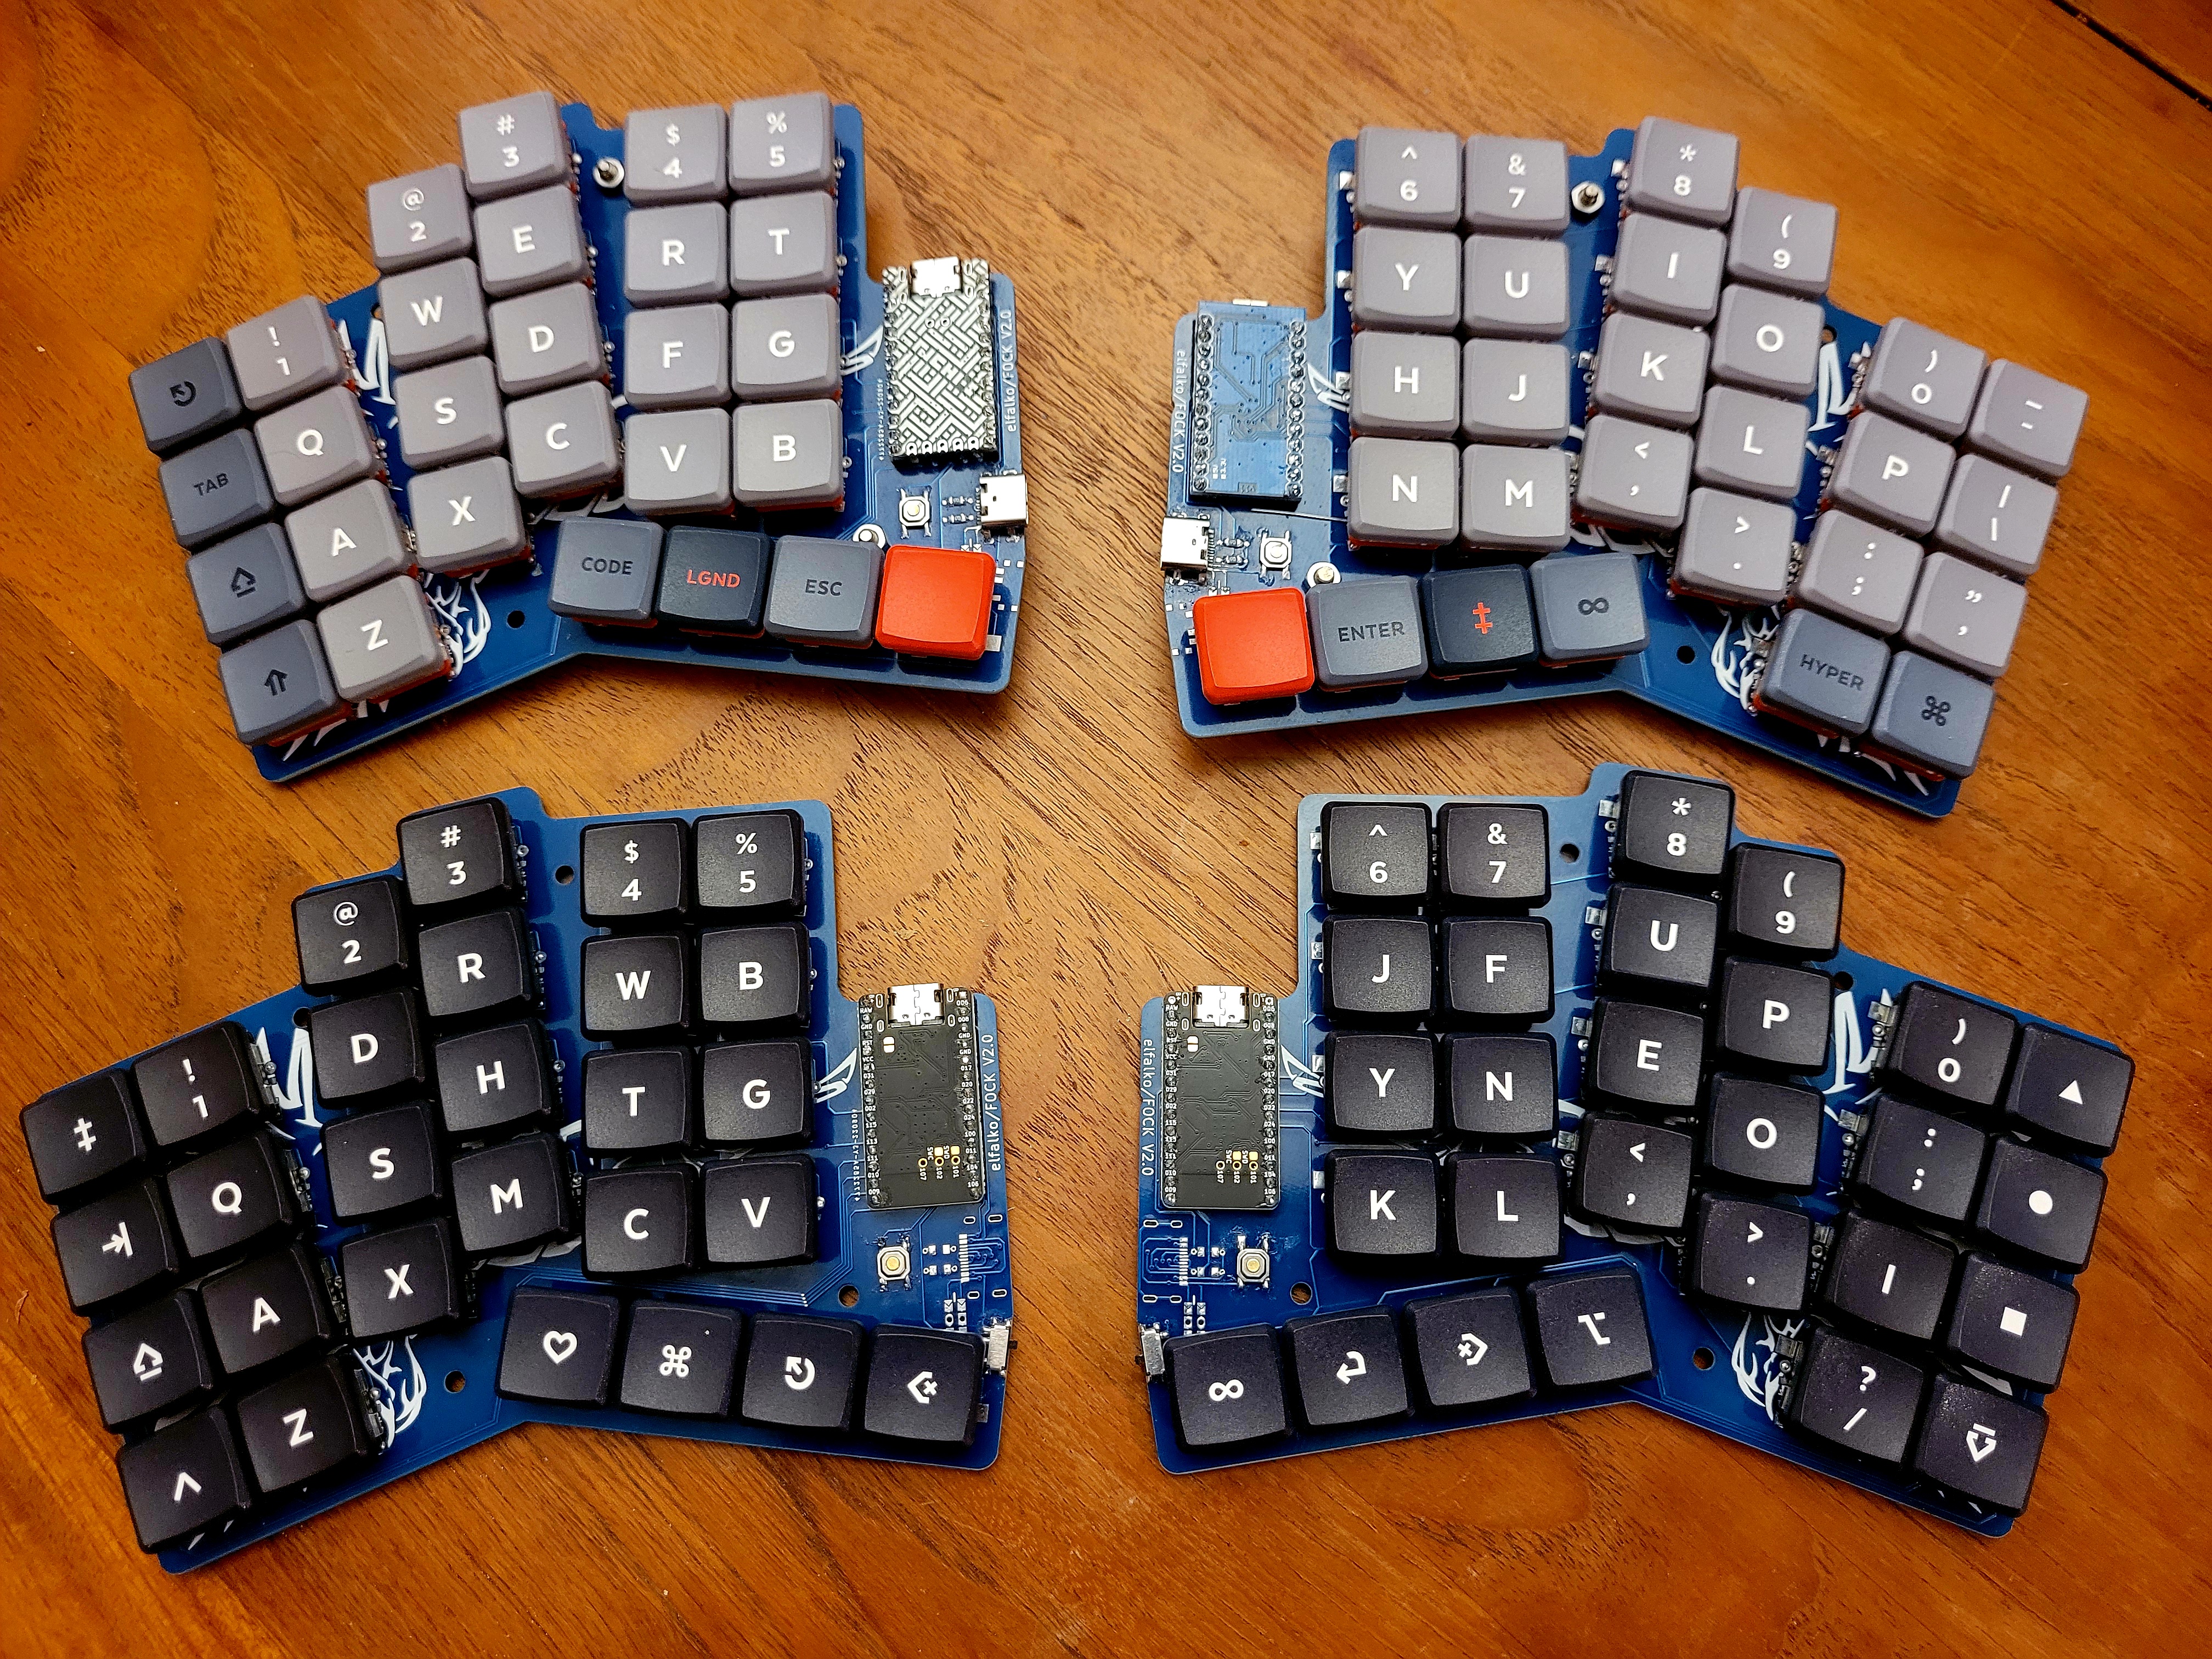.jpg "The two boards which I assembled side by side")
The next keyboard iteration will get footprint an easily visible RGB led to symbolize layer changes and layout changes. I can do without, but it would help sometimes.
Overall, a great experience. With two sets fabricated, and all parts for a 3rd set still in storage, the price per keyboard set is way lower than a Kinesis freestyle, and it fits my wishes, layout preferences, aesthetic and hand size way better. If you have the time, I can therefore recommend spending it on designing your own keyboard.
Big thanks to the ZMK team, Ben Valleck and MrZealot! Without both of their work, it would have taken me way longer to get this completed.
All ergogen files for the FOCK can be found on my github, as well as my layout for it. Should you decide to build your own, send me a picture!