Uneven beds are a staple of 3D printing and leveling them can be an artform in itself to ensure every print sticks. But what do you do when your bed is not uneven, but curvy?
I've written about the Voron I built before. Among other things, Vorons are equipped with an inductive probe to allow leveling both the gantry (the x and y assembly hung up on 4 steppers in z direction) and to create height maps of the print bed for auto leveling. This is no Voron specific feature but quite common in the 3D Printer world.
Auto leveling basically means that the printer takes the shape of the bed into consideration. If a part of the bed is higher, the printer offsets its Z-position in those x/y coordinates to account for it and avoid squishing the extruded plastic too much or too little. However, it would be even better if the bed isn't uneven in the first place.
Klipper, the firmware running on the printer, allows defining the grid which is used to create the mesh of probe points to approximate the bed shape. I chose a 5x5 grid for more detailed resolution. Unfortunately, my bed looked closer to a potato flip than to a flat surface than I had hoped. Luckily, the graphical depiction exaggerates the real values and overall there is only a .2mm difference. Still, about as thick as a single layer of the print.
(It is important to note that this could also be due to a bend y-axis on a Voron, but I do not think this is the case on my printer, since I rotated the beam and the problem remained.)
At some point I had a bit of a mad idea: the Voron has a PEI plate for easier print removal. This means the bed is basically a sandwich made of the following layers (top to buttom):
All stickers stick to the aluminum plate. That means the PEI plate is only held on by magnetic force and gravity. It is easily removable and flexible enough to adapt to changes in the underlying surface to a certain degree.
So theoretically it should be possible to even out my potato flip bed shape by placing something thin underneath the sagging parts. Unfortunately, it needs to be both very thin and heat resistant, since the bed is regularly heated up to 110°C.
I chewed on this for a while but then remembered I had a roll of kapton tape lying around. Kapton is a polymide film which is very resistant in a wide range of temperatures and therefore used not just in 3D printing but many applications up to coating NASA's space shuttle wires according to wikipedia:
"wires were coated with an insulator known as Kapton that tended to break down over time, causing short circuits and, potentially, fires."
Huh, maybe I should not use it to coat wires then. Good thing I only intend to use it as a standoff.
I basically used my bed mesh feature from mainsail as a guide. Since I had 5x5 probe points, I knew where to place each strip of tape on the bed. While the tape was far from wide enough to cover the entire surface, I figured I could just lay down some tracks and the bendy PEI would cover the gaps in between nicely.
So it was just a matter of iterating layers until the bed got flatter. Kapton film is 0.03mm thick and the adhesive is supposed to be 0.04mm, so each layer should adjust by about 0.07mm. Since I can only adjust upward, I started with a single line in the most saggy part in the middle.
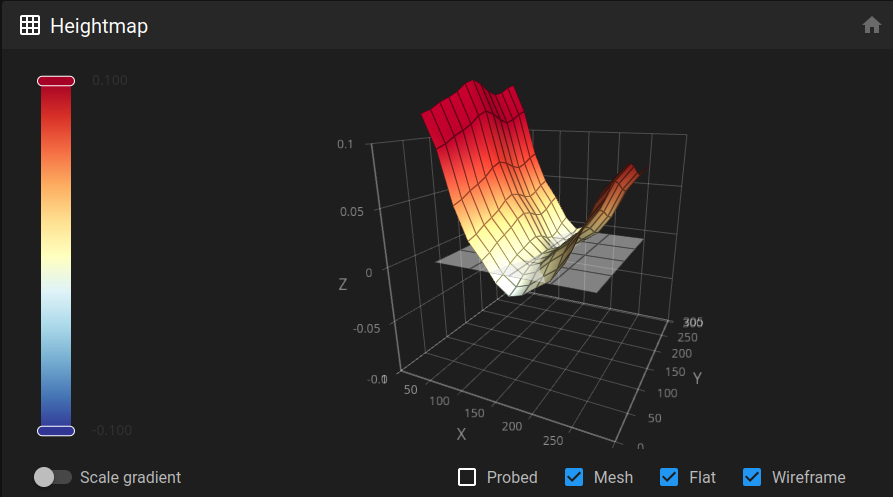
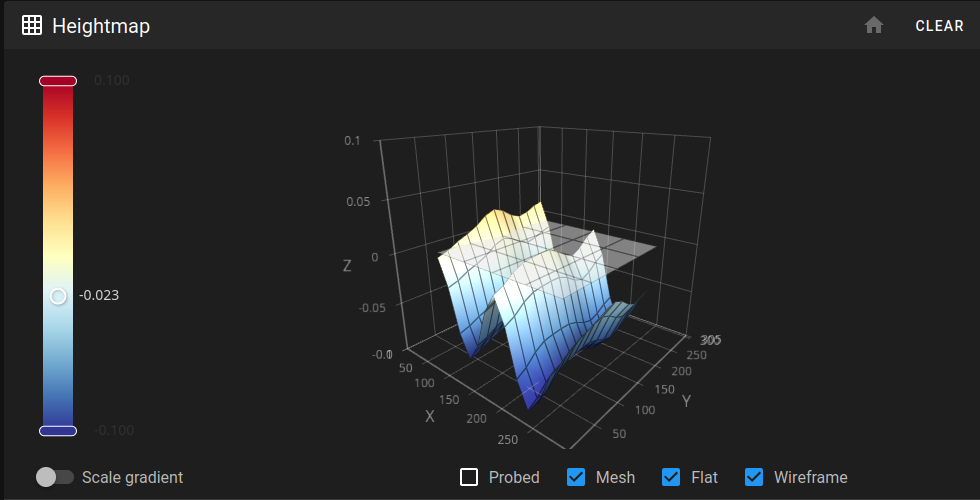
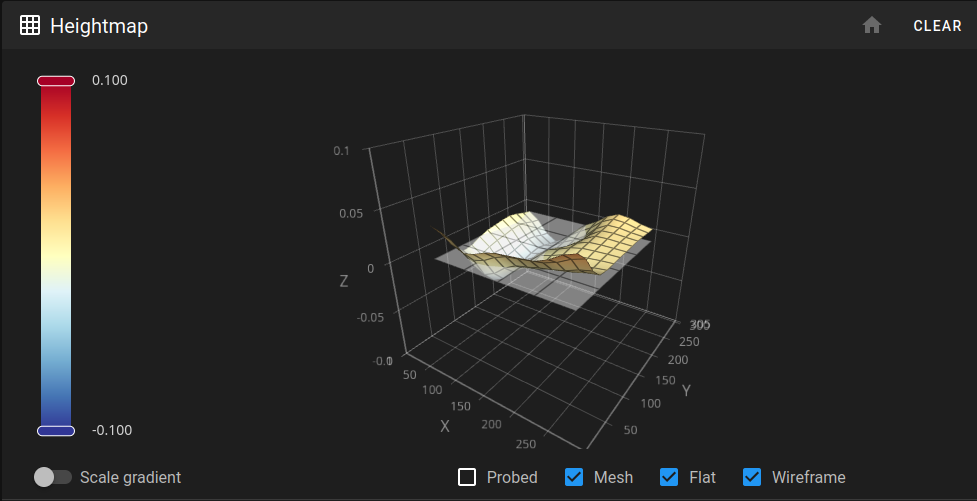
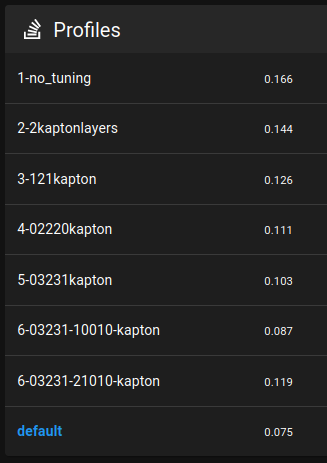
That brought me to a W shape. So I stuck another layer in each of the minima of the W and things got way more even.On I got lucky that my bed is mostly bend in X-direction, so I laid the tape in Y-direction only affect local parts of the curve.
Once the X-direction looked satisfyingly, I started correcting Y-direction. Now I needed to partition the tapes so the overlap with the others did not mess up existing adjustments.
After I reached a satisfying level, I adjusted my Z-Offset with a few test prints.
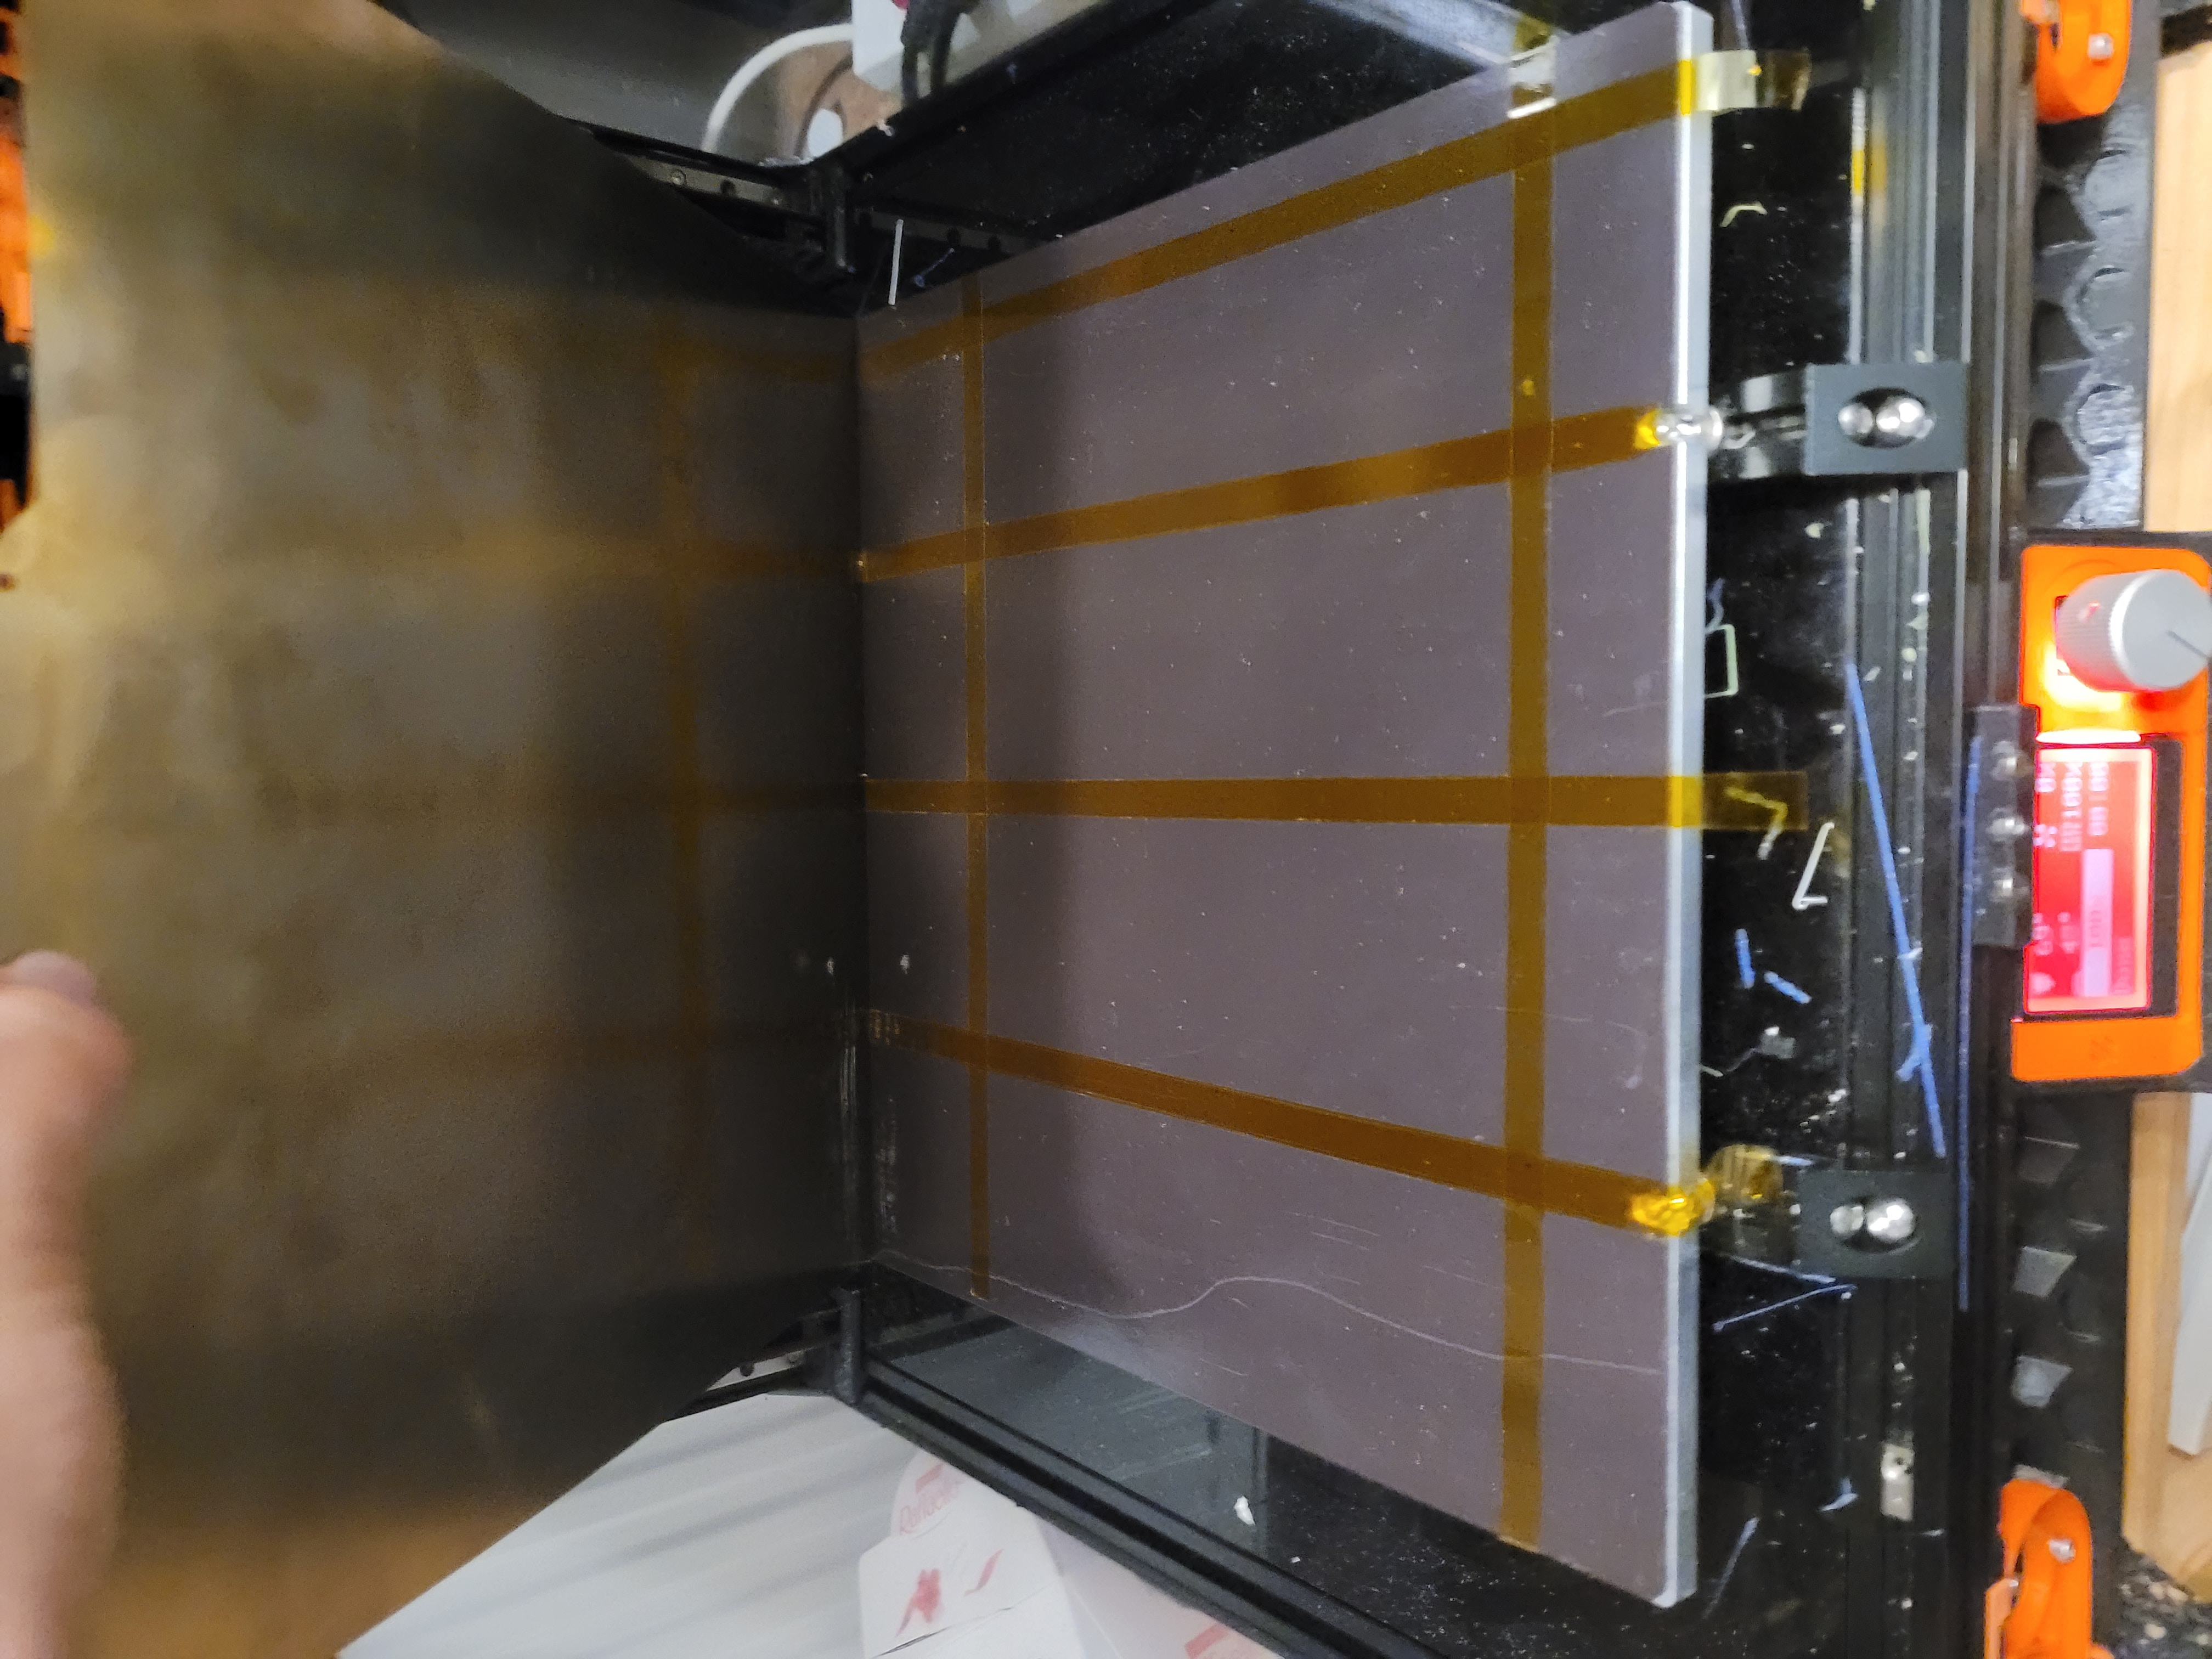
Overall, things stick better to the plate now than they did before and the fix is non-invasive, durable and cheap. I've seen Kapton used as a print surface before this, but not as a leveling help. Although a google search suggests similar attempts have been made. I can only recommend trying the approach.
No next post ▫