
Review: Ergodox EZ - Getting started with split keyboards I
A bit of introduction
Just in case you are wondering how I got the idea that I should break my keyboard in half:
As many people these days, I use my keyboard daily. I learned 10 finger typing in school and touch / blind typing a bit later, and switched to an US layout from the German one as it just annoyed me where all the special characters were placed.
My first own laptop, a secondhand Thinkpad, had a Cyrillic keyboard with some German stickers on top.
For some reason it was like a weird mix of an Iso keyboard and a qwerty one, and had neither the key for <>| (German layout, bottom left next to shift) nor the key for \| (US, top right above enter).
Since I started bash scripting and C programming on that laptop, that was a major hindrance.
I read up on xkb, the x server keyboard extension, to remap those keys and regain my programming abilities.
So changing my keyboard up was nothing new for me.
Then last year, I visited the 36c3, the Chaos Communication Congress in Leipzig.
People were driving beer mate crates powered with hover board electronics, glowing like disco balls thanks to EL-Wire.
LED cubes lit up the dance floor and the dark fair halls as well.
After a year abroad without the proper tools for tinkering, this really kickstarted my motivation for projects.
A friend of mine went to a mechanical keyboard meetup there.
While I knew these existed, I had never seen any reason to get into mechanical key switches.
I'm pretty happy with how my keys work and something like actuation distance or operation force never bothered me.
However, we talked a while, I ended up looking at keyboards on the r/MechanicalKeyboards subreddit and saw a corne keyboard.
Something clicked, and I started thinking about split keyboards.
I currently use a rather small Dell XPS13 laptop, which I got when I started traveling a lot and did not want to lug my Thinkpad around.
It has been a great daily driver so far, but after a full day of working on it I notice that my hands are closer together than absolutely comfortable.
So why not take the opportunity for a soldering project and build a split keyboards?
After the Congress was over, I ordered some EL-Wire to light up my bike and did a lot of home renovation, which had the higher priority.
And then Covid-19 came along.
I spend a lot of time at home on the internet again, again fascinated by the shiny pictures, and the time felt right to get started.
Testing the waters
While I already knew I wanted to solder something together on my own, I personally think it never hurts to have a trial run to dial in your expectation. By chance I mentioned this to my friend, who told me he had recently scored a secondhand Ergodox EZ on ebay. He got all the bells and whistles, wrist pads and tenting kit. He had trouble getting used to the ortholinear layout, so he wanted to sell it again. However, he saw no harm in letting me test it first.
Testing Ergodox EZ
Introduction
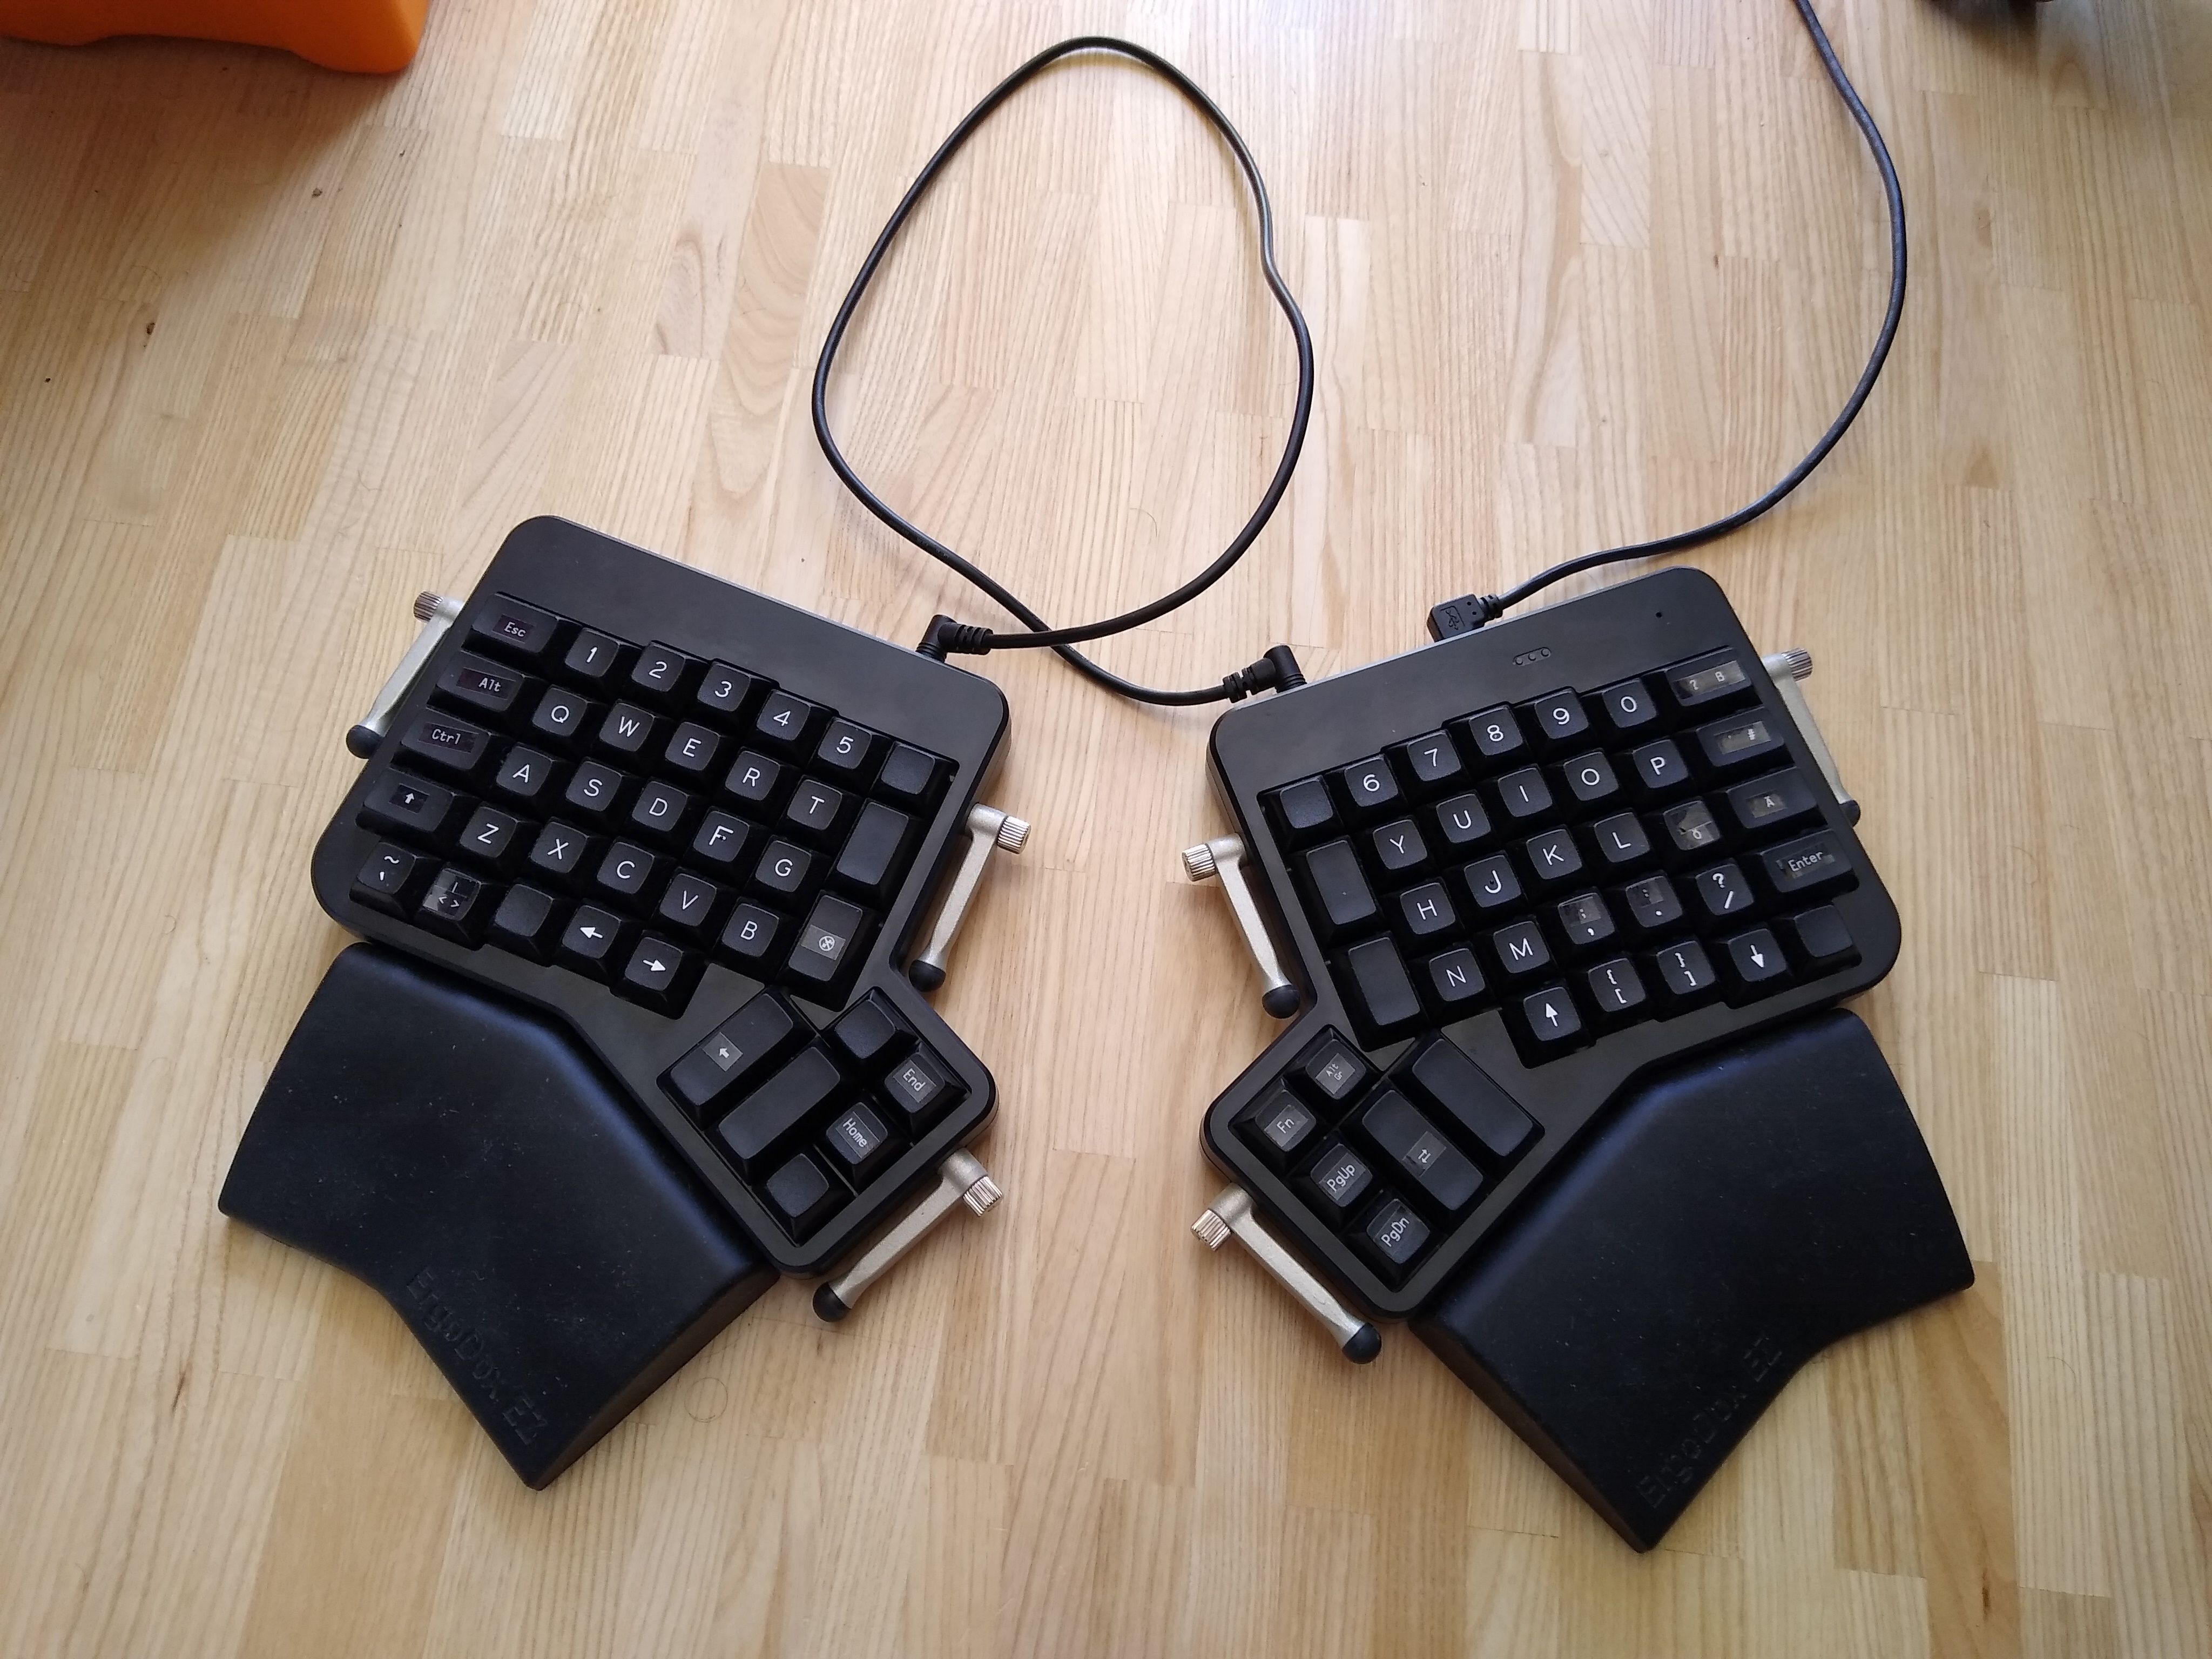
Now the Ergodox has 4 features which make it stand out from a normal keyboard. Many custom keyboards share them, so let's take a look at the overview:
- It is a split keyboard. One half connects via USB to your PC, the other connects with a TRRS cable (like an audio cable, but with 4 gold rings) to the half connected to the PC. The split allows you to position the halves any way you like on the table, preferably in a way that avoids any uncomfortable or straining hand positions. This is supported by the tenting kit, which allows positioning each half at an angle, e.g. both slanting outwards like the side of a tent - also to achieve a more comfortable position.
- It sports Cherry MX mechanical keyboard switches. Mechanical switches have a large fan base. They have a different feeling than cheaper rubber dome switches used in many normal keyboards. You can get them in a large variety, sporting different actuation forces and behaviors, with linear, tactile and/or audibly clicky behavior to help you now when exactly a key press is registered. This cool guide helped me figure out what that was all about. Cherry shows typical actuation force graphs as well. Of course there are also many other fish in the sea, such as Gateron, Alps, or Kailh switches. But the principles remain the mostly the same regardless of manufacturer. This Ergodox sported Cherry MX brown keys. Cherry is probably one of the oldest and most well-known switch manufacturers, and the Brown variant is their standard all round workhorse. The switches are also hot swappable, but I did not try that as I had no other switches on hand.
- With the keys come removable key caps, with a Cherry stem. This is so you can change them for different colors for style, different symbols for changed layouts, and even for different sculpts for ergonomics or if you just want to let everyone in your office know your favorite starter is Bulbasaur by placing a tiny sculpture of him on your escape key.
- It has a reduced keyset of 76-80 keys in comparison to the 104-108 keys of full keyboards, which include the number block and the arrow keys. The community usually gives a percentage of how many keys the layout has, and the Ergodox comes in around 75%.
- The entire thing has a configurator which allows remapping keys, which is necessary as some rows just don't have enough keys for all the ones you are used to from normal keyboards. I assume it runs on some fork of QMK, but I haven't really checked. They have a nice graphical web interface which works really well. More on that later.
Configuration and Layout
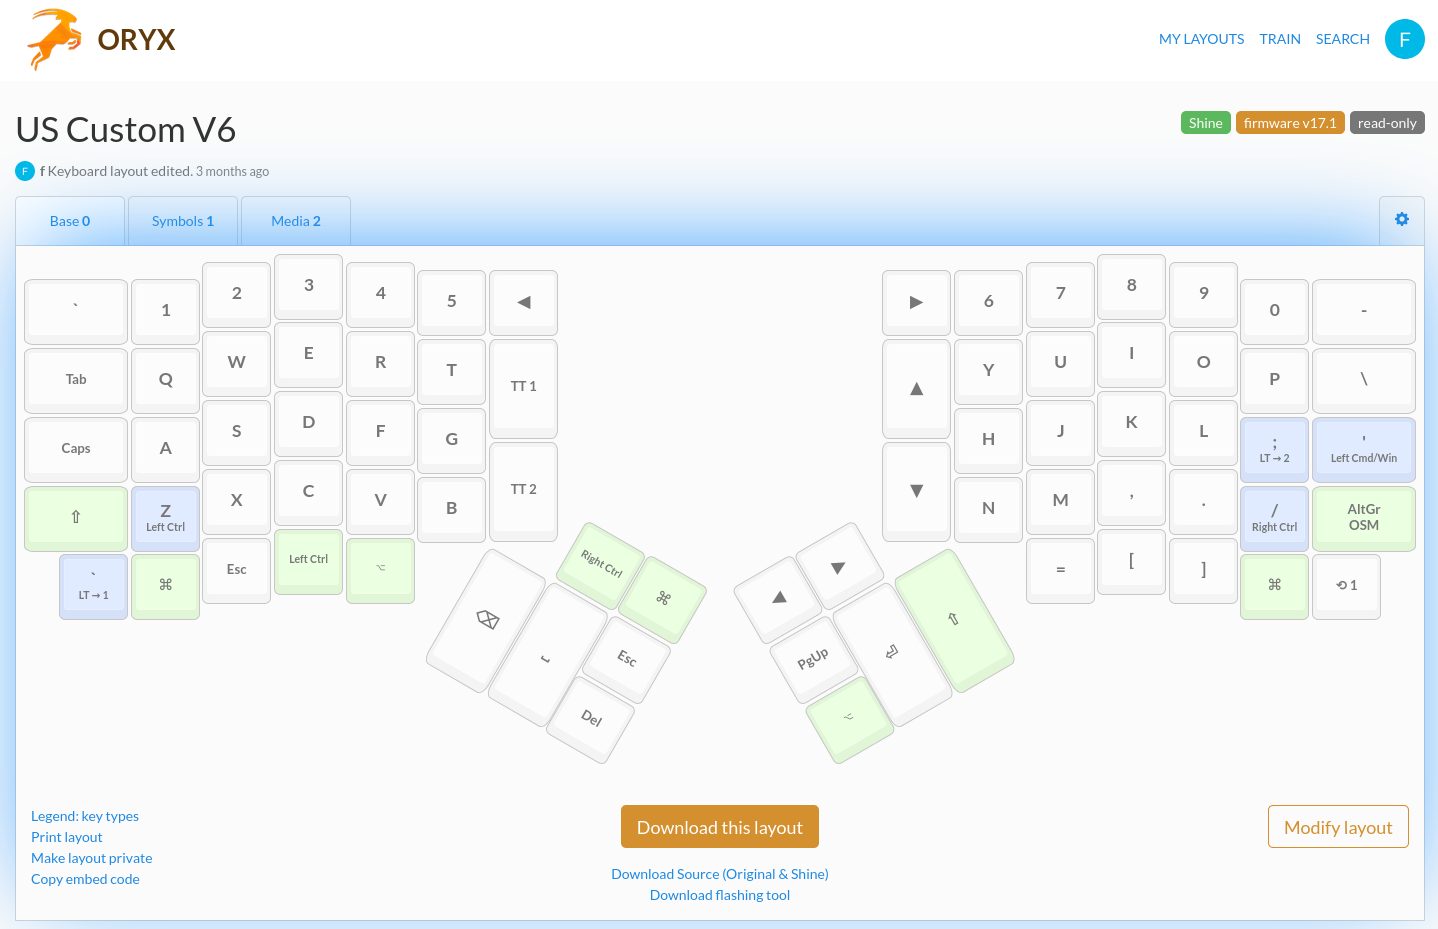
So as soon as my mate dropped them off at my placed, I installed the drivers and got typing. Right of the bat, I noticed the layout was kind of wonky for me. I missed the caps key as my i3 modifier. So I fired up the software and added it. The cycle looks like this:
- Figure out something doesn't work
- Look at your layout or others to get a nice idea where to put your key in the Oryx online editor
- Configure that.
- Download it
- (Download and) fire up the Wally flashing tool, select the new layout, click flash
- Grab a small screwdriver/wire and press the reset key on the keyboard, pushing it to boot mode so it accepts the flash
Overall, that works reasonably well.
The default key choices were a bit strange for my taste, and I instantly noticed the key row missing on the right.
I shifted =, [ and ] to the bottom row for easier access.
I played around some more, but suffice to say it takes a while to get used to the layout you come up with.
Which keys you push where depends mostly on your habits, so I won't lose many words about that.
Getting used to typing
The next thing to notice was the ortholinear layout. Normal keyboards use a staggered layout, where keys in one row are shifted against the next. Since fingers mostly extend straight outwards, the keyboard community often uses ortholinear layouts. This makes changing a bit challenging as your muscle memory works against you for a while. Ironically, the num pad - which is omitted for the sake of minimalism on many custom keyboards - is the most well known part on a normal keyboard featuring ortholinear layout. So if you are a big fan of that, maybe at least the right hand transition will be easier for you than it was for me.
I just tried switching over to the Ergo during normal programming and it was a pain.
My fingers are not used to the layout, I constantly look down and I feel like I'm loosing time.
Sure it is cool, but I'm not flowing or anything.
So I followed the community tips and fired up keybr and ktouch (on linux). Both start you of with 2-3 keys, let you train them until you know them and then add more, bit by bit.
(Note that there apparently also is a special Ergodox trainer on the manufacturer's webpage.
I only found it when I took a screenshot for this post though, so I haven't tested it).
That is definitely the way to go here. Within a day or two I was up to usable speeds on the Ergo. It also helped not to worry about all the brackets and strange symbols first. There are many typing trainers out there. I tried some others, but so far liked keybr best as it auto generates text for you and has short training cycles, which prevents the feeling of getting stuck in the same lesson over and over somewhat. Not totally, some keys took forever to get up to a good confidence level and the algorithm does have a limited amount of syllables to work with. But better than doing the same lesson over and over on ktouch.
Another feature of many custom keyboards are layers. Think of this like pressing the shift or alt key: The moment you hold shift and press a letter, a different symbol is printed than without. The idea is replacing less hardware keys with more software ones. It works well, but takes some getting used to.
Actual usage
Now that I didn't totally suck at using this anymore, it was time to actually reap the benefits. Normally you adjust the keyboard halves on your desk, but I had recently broken my foot and had to prop it up at all times to reduce swelling, so I put both halves on my legs and the wrist pads under my propped up knee. Since I often have my feet on the table at my desk at home, this is a common setup for me. It worked ok. Having both halves at different levels on my leg worked, at least better than a normal keyboard. The tenting kit was useless, but that was to be expected. The wrist pads were comfortable. I happily typed away, adjusting my layout slowly.
And I noticed that half the thumb cluster is unusable to me: I can reach all the lower buttons, but the second row above them need some serious flexing. Avoiding that is kind of the whole point of this setup. So I dropped only the most rarely used keys on those buttons, like right alt, right control and such stuff. You could probably add macros here, but in my mind that is wasted space and a bad design.
The keyboard also felt kind of thick. When I was finally allowed to put my leg down, I also used them on the table. The feeling remained. I only felt comfortable using them with the wrist pads. Those are really good, but more stuff to lug around. The weight and dimensions don't help here.
The tenting kit also works. The underglow LEDs give a nice layer indicator at a short glance. I actually 3D printed some sculpted key caps from geodynamics on thingiverse for easier access to different rows, which was a fun exercise but didn't stick. However, key cap swapping in itself works nicely. The cherry brown switches felt nice, but were kind of loud in my opinion. On my i3 setup, I could actually do 99% of all things with my keyboard and hardly ever use my trackpad. On my Ubuntu Unity university setup however, I was constantly reaching for the mouse. Something to help with this would have been nice.
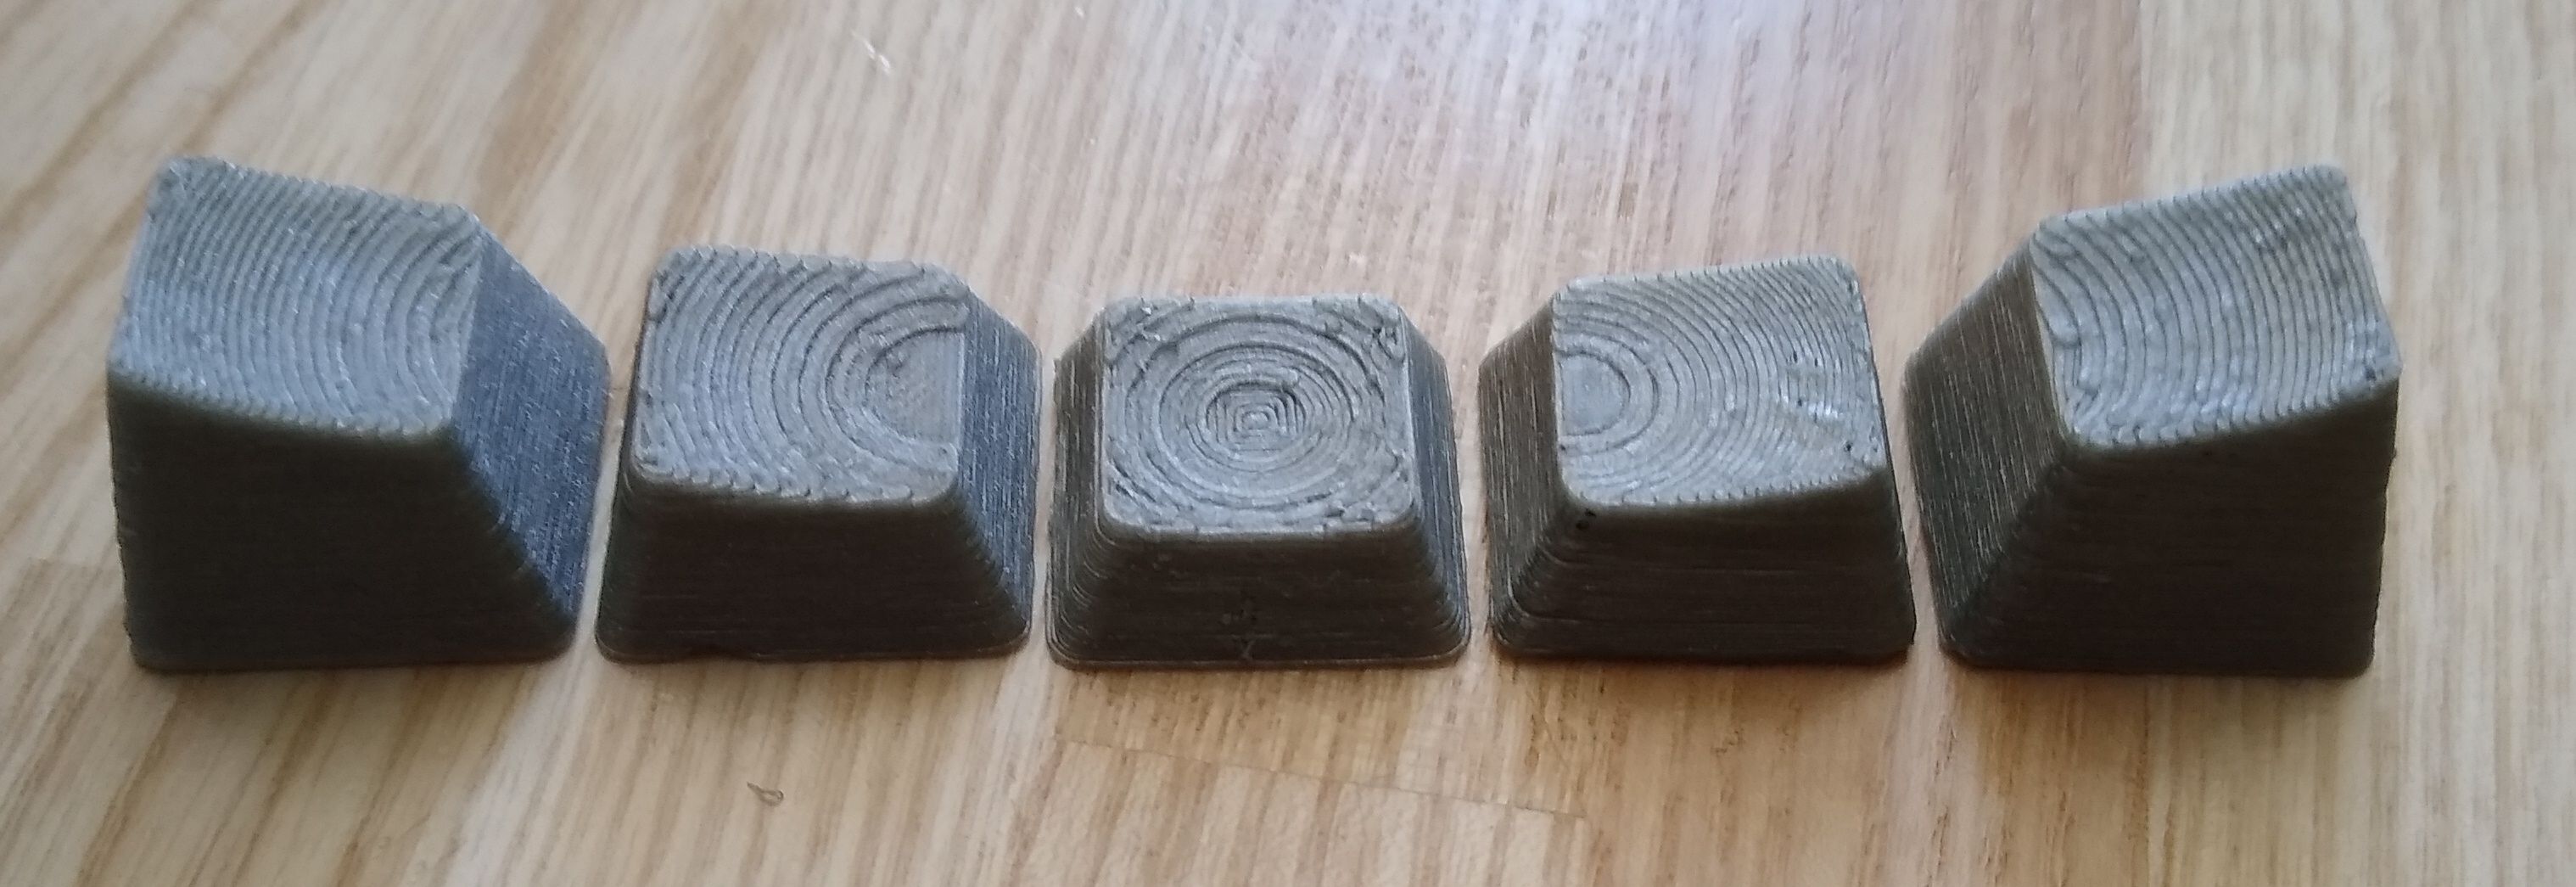
Sculpted key caps from geodynamics, a bit rough - erm, with good haptic feedback
Conclusion
Overall, I knew this keyboard was not for me.
Don't get me wrong, it is a nice keyboard. You can exchange the keys and caps to suit your wishes, the software makes it easy to use, and it seems well made. The hand rests are nice and comfortable. The tenting kit works well.
But at a price point of 300+€ it was just not what I was looking for. It was not carryable. The keys were ok, but I didn't like their thumb layout. Also, I wanted to build my own. So I knew I had to look further. But I had a few new points for my list:
- it needs to be light. If necessary, I was willing to sacrifice key travel, case, and looks.
- it needs to be slim. Then I can avoid wrist rests.
- No backlighting. While fancy, I don't look at it.
- No adapters. Either choose the right microcontroller with Bluetooth/USB-C/micro-USB or making custom cables.
- I want enough keys to have an easy transition: number row and everything up to backspace, enter and shift should be in there.
- ortholinear layout is fine, but I like staggered layouts as well.
- while I might design my own PCB at some point, starting with a kit seemed a good idea.
In the end I settled on the BuzzSaw kit from gHeavy Industries, which features a traditional layout, Kailh Choc low switches, almost all keys I am used to, and the option to split the keyboard and break of keys you have optimized away with better layouts. Even though I have already broken it once and am waiting on parts, it already was more than double the fun at less than half the price. Once it runs more stable, it will probably get its own post.
If this got you thinking, I once again highly recommend r/MechanicalKeyboards and collections like this awesome split keyboards collection, which provide you both with great information and enough eye candy to get you started. But do realize that this will easily cost at least a hundred bucks, more if you go down the key cap rabbit hole, so don't tell me I did not warn you.
- ← Previous
Designing a trimmer charging stand - Next →
My packing list